Joined: Oct 29, 2012 Posts: 21 Location: Poland, Poznan
Posted: Mon Apr 15, 2013 1:27 pm Post subject:
Hallo,
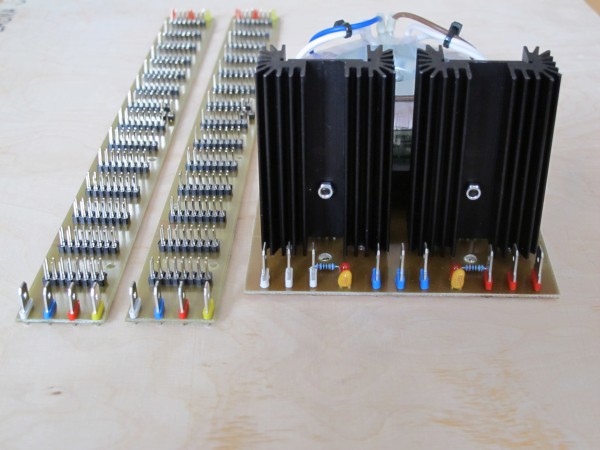
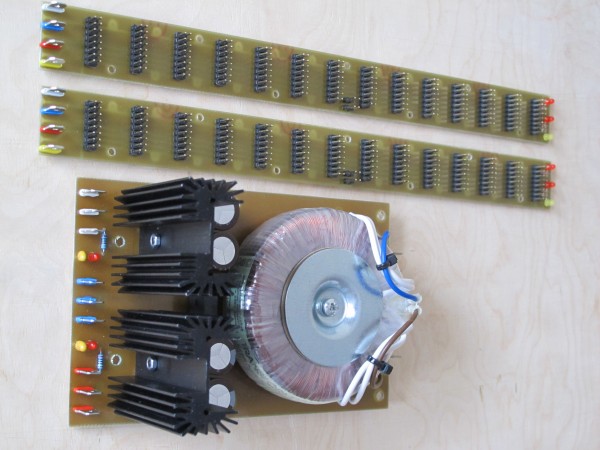
quite boring design, but necessary. It's high quality modular synth PSU, simple and effective. All boards made at home, total cost about 25 euro. Fully tested and working. 2x1,5A@12V output.
modular_PSU+busboards_2_SyntherJack.JPG
Description:
PSU + busboards
Filesize:
1.64 MB
Viewed:
684 Time(s)
This image has been reduced to fit the page. Click on it to enlarge.
modular_PSU+busboards_SyntherJack.JPG
Description:
Another shot - PSU + busboards
Filesize:
1.96 MB
Viewed:
820 Time(s)
This image has been reduced to fit the page. Click on it to enlarge.
Here's a 5U setup that I've been working on. Ever since I started designing things, I haven't had a synth of my own. (selling off boards and modules to fund new prototype runs) hehehe
So as of a few months ago, I started building this guy:
Joined: Jun 25, 2012 Posts: 20 Location: New England
Posted: Thu Apr 18, 2013 9:00 pm Post subject:
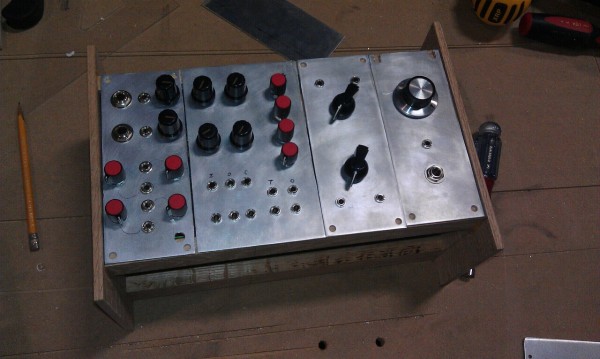
It doesn't look like much, as I'm just learning the process of making panels and using wood so I just wanted something to practice with. The circuitry is all very simple and the sound leaves much to be desired. It all runs off a single 9V supply. From left to right there is:
- 2 single-transistor VCAs with a passive 2-input mixer each. I can't remember the circuit, but it doesn't work that great.
- 2 Low-pass VCFs.
- 2 A/D envelope generators (still fine tuning these)
- White noise generator - simple 2 transistor circuit I found online with a single transistor boost circuit to bring it up to a usable level. The knob is a volume control (redundant, I know)
Not shown is a simple dual square/triangle LFO, also found on the forums here. It has since replaced the white noise generator.
I still have no idea how to put graphics on panels. I could figure out the etching part as I've done it with PCBs but designing things on a computer that have real-word dimensions is totally foreign to me.[url][/url]
STUPIDSYNTH.jpg
Description:
Filesize:
264.86 KB
Viewed:
684 Time(s)
This image has been reduced to fit the page. Click on it to enlarge.
Joined: Mar 20, 2012 Posts: 2177 Location: Chicago
Audio files: 16
Posted: Mon Apr 22, 2013 8:59 pm Post subject:
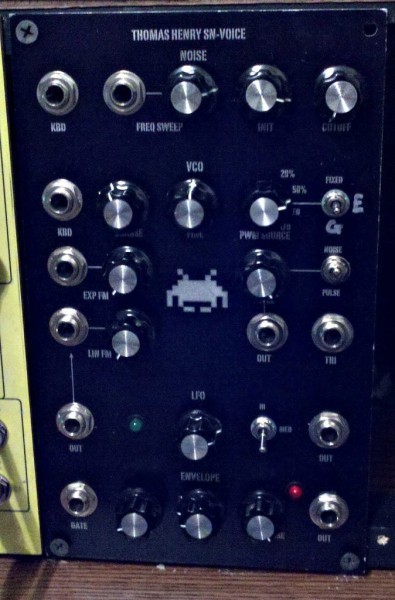
SN Voice
Missing AC/DC switch on the panel (not really needing it I don't think) and I messed up the three way switch for fixed/envelope/gate (got Env & Gate backwards), but pleased with it nonetheless....
2013-04-22_02-01-37_170.jpg
Description:
Filesize:
140.63 KB
Viewed:
670 Time(s)
This image has been reduced to fit the page. Click on it to enlarge.
Going to post this here since some of the designs were provided by Vtl5C3:
Here is a serge style panel I built last year, still have to calibrate the LPG's properly and figure out a neat power solution:
I used:
2x CLEE LPG(one slow, one fast)
1x AndrewF "Double Jerkoff"
1x AndrewF "2 Neuron"
1x J3RK 258J
1x 266(Self etch using VTL5C3's layout from 266 thread)
1x J3RK 291J
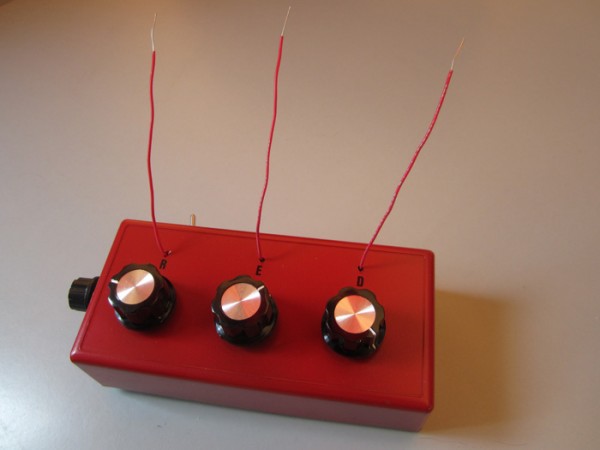
After seeing all these highly-polished super-clean builds being posted in this thread, I feel a little silly posting this ridiculous battery-powered noise box of mine.
It was supposed to be quick side project whilst taking a break from a large complicated build. It basically just exploits floating inputs of three 4046's, and thus can be "controlled" by waving one's hands near. Cats can play it too.
The build was cursed... despite being quite simple, I made several errors soldering, ruined 2 enclosures, had trouble finding a 3rd knob of the right size... anyway...
Excellent James - we need more cat-operable instruments . Now I just need to acquire a cat... I also liked the (almost) subliminal King Crimson event. I'll have to try out your idea some time.
Joined: Mar 20, 2012 Posts: 2177 Location: Chicago
Audio files: 16
Posted: Sun May 19, 2013 8:20 am Post subject:
Thanks
Kits are easy to do clean, especially when they are as well documented as this one. You don't want to see the stuff I've done on protoboard (or, well, you could probably dig it up in the 2012 build thread ).
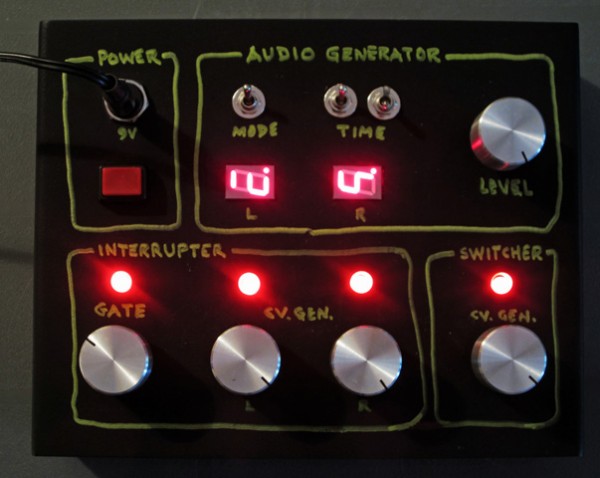
This was my most complicated build so far... 11 chips, and the culmination of many hours of research and failed attempts.
The box automates the control box I made for my crazy speaker installation wherein 32 of 94 speakers are wired up and 2-channel sound is sent pseudo-randomly to one speaker per cluster, as well as channel gating. So now installation is truly standalone, producing ever-changing results.
I finally broke down and used PICAXE microcontrollers to generate 8-bit numbers which feed R/2R DACs, which feed LM324 triangle VCOs for the audio generator part. I used a 7555 to generate a really slow gate signal, and 3 square wave oscillators clocking 4015 shift register stepped triangles to generate CVs.
Joined: Jan 20, 2011 Posts: 171 Location: berlin
Audio files: 6
Posted: Thu May 30, 2013 5:16 pm Post subject:
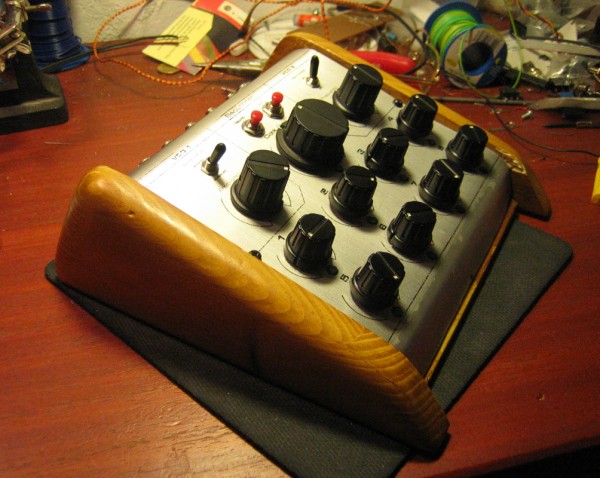
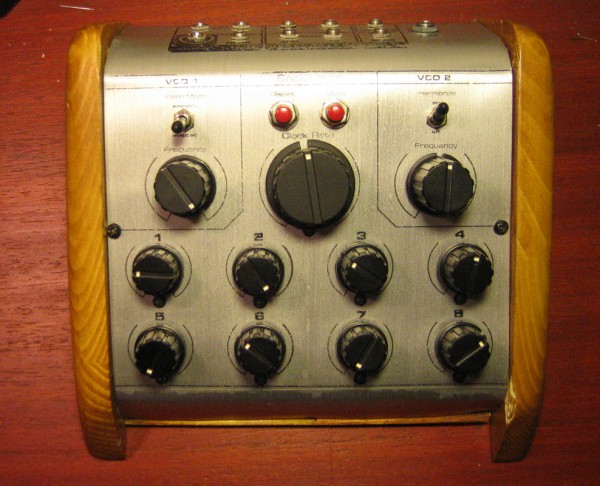
i did a lot of work since i joined this wonderful comunity and finally something that i can show without shame
is basicly a baby 8 cv sequencer plus 2 x 4046 vcos
I wanted to keep it as simple as possible to stimulate the creations of sounds
within certain llimits as a creative input
IMG_9750.JPG
Description:
Filesize:
813.32 KB
Viewed:
688 Time(s)
This image has been reduced to fit the page. Click on it to enlarge.
IMG_9751.JPG
Description:
Filesize:
813.21 KB
Viewed:
812 Time(s)
This image has been reduced to fit the page. Click on it to enlarge.
Joined: Jan 20, 2011 Posts: 171 Location: berlin
Audio files: 6
Posted: Thu May 30, 2013 5:25 pm Post subject:
I've been a bit ruff at the end. so i damaged the wood while i was hammering the aluminium to adjust it on the right angle. also the decal was shit...i believe they sent me the wrong type...but the final result is kind of vintage, looks really like a machine that already been used for long time
ps. the panel layout is completely inspired by Fonik as u can notice
Looks great tokyomatik
I especially like the curved wooden side panels and would like to have the skills necessary for that... maybe in some years
Placement of the knobs is also very good, it looks like a production instrument!
Joined: Jan 20, 2011 Posts: 171 Location: berlin
Audio files: 6
Posted: Fri May 31, 2013 5:52 pm Post subject:
thanks mate
the wood part was the easiest, to bend the aluminium by hand and hammer was more a task...
next time i will split the panel n 3 pieces so i dont have to go crazy to make it so precise to fit the wood construction
for the next times i found a guy that can give me nicer wood and make also the basic cuts, so it will be even faster when i have to build more boxes at the same time. i
Im trying to keep some kind of common style for the design of these boxes, since im having a lot of requests in a city so full of musicians like berlin, this is the way i pay my rent at the moment and i would like to be able to reconize one of my devices directly from the first look.
the friend that requested for this one, left me completely free about the creation of this beauty: "whatever sounds crazy and look also cool and i will find u peope interested in spending soome real cash...." and so it all started...
today i recorded some sounds and the samples created wih such simple configuraton make feel already sad at the idea that this machine has to go
aaprt from the usual squareave / 8bit style basslines, is possible to create some strange pulse sequences that even if only 8 steps are available with some patches are evolving randomly like a musician that is playing small variations of the same riff. here as example the first sequence is dry and the second is the same with beats added, some eq, compression and fx; nothing too fancy, but very inspiring anyway
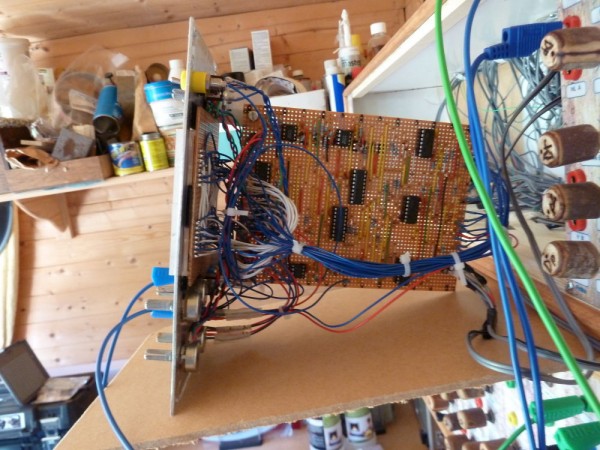
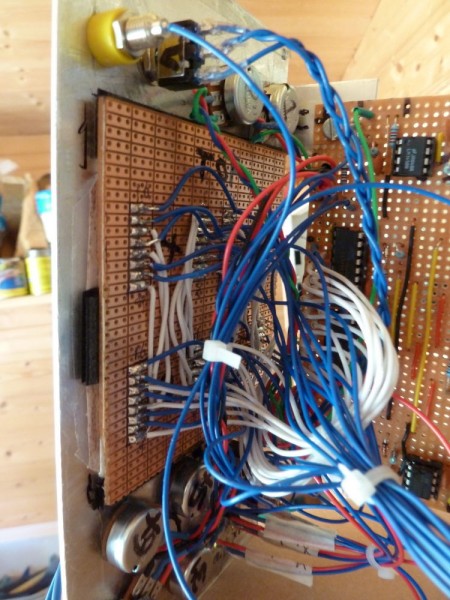
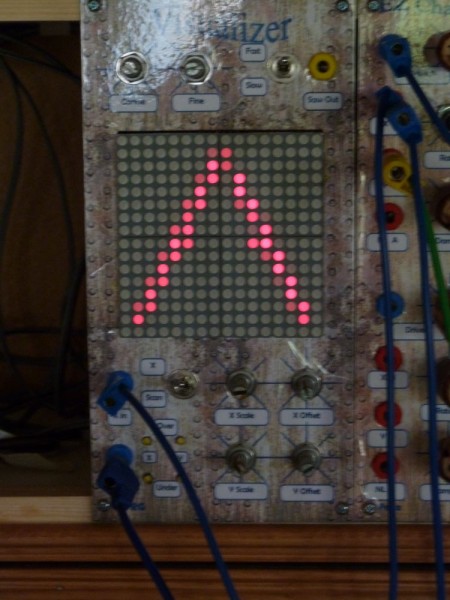
Just completed this new module, which I've called "Visualiser". It's a 16x16 LED array oscilloscope, using LM3914 bargraph drivers to generate the display. Based on the datasheet, with front end scale and offset for both X and Y, and a built in VCO (Nicolas' simple Hz/V saw VCO).
My original idea was to be able to see when one of Ian Fritz' chaos modules was actually in a chaotic region, without having to haul out the oscilloscope. So it's main purpose is as an X-Y. But putting a signal from a VCO into Y and either using the built in ramp wave as X, or using a ramp derived from the signal (ie from the same VCO) it will also show waveforms.
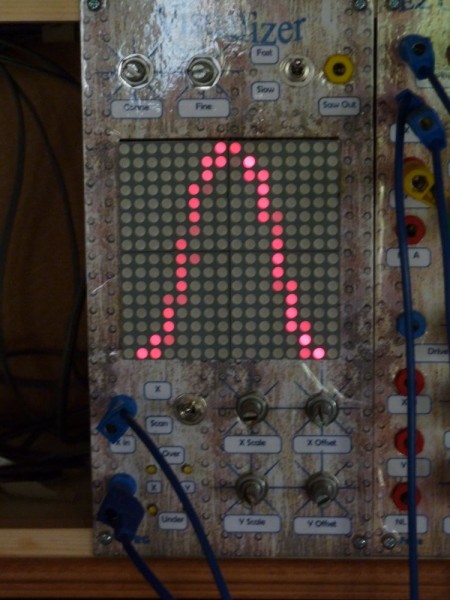
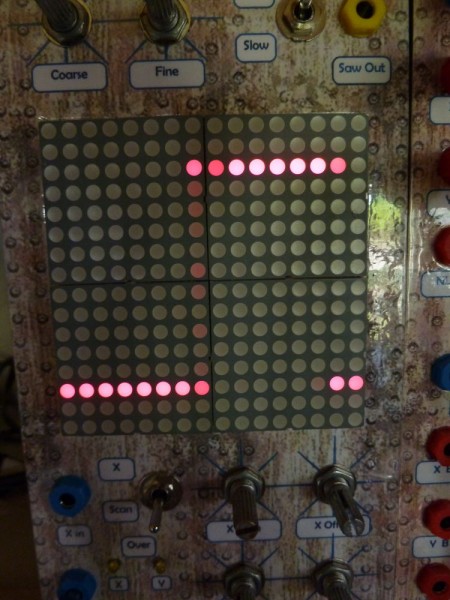
No-where near the resolution of a proper scope of course, but works for quick checks. Here's images of the board, and of sine, triangle and square waves. I'll try to upload a movie clip of chaos and provide a link, as it obviously doesn't show on stills!
Runs of +/- 12V, and takes signals from about 5V to 20V P-P.
I would have said it's a synth module that makes no sounds, nor puts out a control voltage, but I've brought the internal scan out to the front panel - the range is about 4 HZ to 3.5 kHz.
Peter
[/img]
Visualiser board_01.JPG
Description:
Filesize:
168.62 KB
Viewed:
723 Time(s)
This image has been reduced to fit the page. Click on it to enlarge.
Visualiser closeup_01.JPG
Description:
Filesize:
172.11 KB
Viewed:
687 Time(s)
This image has been reduced to fit the page. Click on it to enlarge.
Visualiser sine wave_01.JPG
Description:
Filesize:
128.63 KB
Viewed:
738 Time(s)
This image has been reduced to fit the page. Click on it to enlarge.
Visualiser square_01.JPG
Description:
Filesize:
137.21 KB
Viewed:
742 Time(s)
This image has been reduced to fit the page. Click on it to enlarge.
Visualiser triangle_01.JPG
Description:
Filesize:
124.83 KB
Viewed:
675 Time(s)
This image has been reduced to fit the page. Click on it to enlarge.
Joined: Mar 20, 2012 Posts: 2177 Location: Chicago
Audio files: 16
Posted: Sun Jun 02, 2013 1:26 pm Post subject:
That is a brilliant idea. My scope doesn't do a very good job of displaying X-Y anyway... I have some 3914's, I'll have to see if I have any matrix displays lying around....
You cannot post new topics in this forum You cannot reply to topics in this forum You cannot edit your posts in this forum You cannot delete your posts in this forum You cannot vote in polls in this forum You cannot attach files in this forum You can download files in this forum

 Forum index » DIY Hardware and Software