Ayab
Joined: Oct 27, 2015
Posts: 181
Location: London, UK
|
 Posted: Mon Jun 12, 2017 5:26 pm Post subject:
DIY PCB Nail Polish Remover Silkscreen Posted: Mon Jun 12, 2017 5:26 pm Post subject:
DIY PCB Nail Polish Remover Silkscreen |
  |
|
This method really works! Highly recommended if you etch your own boards.
https://www.youtube.com/watch?v=M_m1YBTzgvY
(Not my method just thought folks here would find it useful)
Even if not perfect to read every part it is very helpful as a reference to use in conjunction with the part placement diagram and/or schematic.
Make sure you use nail polish remover with acetone (obvs!) and careful not to tear the paper: Stop rubbing as soon as the paper starts to flake at all. Works best with just fine outlines and text (and you will be surprised at how well small details transfer). Basically normal resolution text and lines come out well.
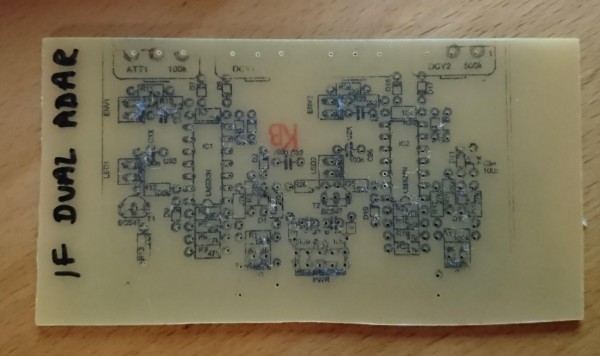
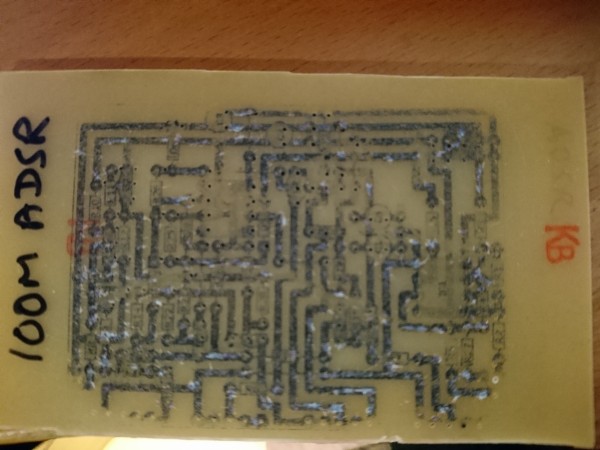
Attached pics of my first attempts:
The Ian Fritz Dual AD/AR came out really nicely - but some little scraps of paper left that I need to wash off. I could touch up the pot that didn't come out so well with marker pen. This was the parts placement found on this site somewhere. So just a standard parts placement sized correctly to fit ontop of the foil layout and then mirrored and printed.
The 100M ADSR didn't come out so well because the transferred picture had thick black traces which makes the paper stick to the board. It can be washed off but seems to affect the detail of the component labels.
If you have a parts placement diagram with heavy coloured traces or background it may help if you invert the colours in a graphics program. I don't have a colour printer so need to go and find one to use. Will post the next attempt soon.
Sorry for my rubbish board cutting skills too! Find that a bit difficult.
Feel free to ask me any questions but it doesn't really have any bad stumbling blocks.
| Description: |
|
| Filesize: |
219.44 KB |
| Viewed: |
218 Time(s) |
| This image has been reduced to fit the page. Click on it to enlarge. |

|
| Description: |
|
| Filesize: |
3.18 MB |
| Viewed: |
222 Time(s) |
| This image has been reduced to fit the page. Click on it to enlarge. |

|
|
|

