|
|
Articles / Image To Sound
Creating Sound From Images
by Muied Lumens
Creating audio from images is a very intuitive way to compose sounds. Since we humans are so visually oriented it is convenient for us to link the two together. It seems that there are some universal ways we look at sound, literally, as computer musicians - as a waveform, or blocks of arrangements that are "read" from left to right, just as we read text (well, at least in English). If your software allows you to view the audio as a spectrum, or even as a frequency analysis, you can get a lot of info about that sound very quickly. This should also give you an idea about how most programs work in principle, but more on that later. For now, let's have a look at... Your Options
Before you can do any image so sound (and hopefully back) conversion, you need something that can do the job for you. The idea has been around for a lot longer than you may think. Daphne Oram invented a machine that was able to create sound out of hand written lines, and the ANS synthesizer made use of a glass plate for similar results. Early film sound was based on this same principle, where an optical strip on the side of the photo strip was used to create the sound track for the movie. Oramics, which follows this principle, is available as an iPhone app and is not much money for a lot of fun. It sounds convinsingly old school to me, and is very simple to understand. An other app that works in a similar way and lets you load your own samples, is Gliss. One app with a unique approach is PPG Wavegenerator for the iPad. It lets you take a picture or load one from the camera roll to create a spectrum for use as an oscillator. PixiVisor by the creator of Sunvox, Alexander Zolotov also does video and animation and is worth checking out, and is multi-platform like so many others of his projects. Update: He has added Virtual ANS to the collection and it is a very interesting and fun iPad app! One of the first image file to audio file programs I ever saw was Metasynth, and it still seems to be one of the best options out there. This was the program that Aphex Twin used to create the now famous "Demon" hidden in one of his tracks. It is however Mac only, and it is not cheap, maybe because is a fully featured synthesis and sound design program. Adobe Audition 3 (now discontinued, but available for free if you register with Adobe) can both import and export bitmap files, but this function appears to be mono only and a bit buggy. This feature was also dropped from later versions of Audition. Camel Audio Alchemy lets you import png image files, but as far as I know, it won't let you save sounds as images. It is likely the best sounding synth plugin of its kind out there. Not that there are many like it. Image Line, makers of Fruityloops, include their Harmor plugin with FL studio, or you can buy it separately as an FL plugin. Photosounder has some interesting image and audio editing tools available. It is not free, but is relatively affordable. Audio files can be imported in "Lossless mode" which means that they will sound a bit closer to the original than if imported otherwise. Also, this program lets you work in layers, which is very useful as you can apply special processing between layers, some particular to image editing, and some to audio processing. ARSS from the same programmer has now been abandoned and taken up by somebody else and named Asperes. An other French offering is AudioSculpt, a full featured program from the great research institution IRCAM. Not free, and Mac only. Audio Paint is a free program that does exactly what we want, but does not import sounds, only images (I will explain later why this is important). It has many great features and settings you can play with, and sounds nice, maybe because it uses an additive synthesis technique instead of the masked filter you often hear in other programs. Its main drawback is that it is very slow, at least on my computer, and it has no preview option to let you hear what you are doing as you work on a file. It seems that it is meant for creating fairly short pieces of sound and would be painfully slow for something of a decent quality lasting more than a few minutes. One more free alternative is Coagula, which has a lot of editing capabilities for both images and sound. As with other programs it does not import audio, only images. You can listen to examples from these two programs at the bottom of this page. RGB MuiscLab differs from all the other programs here in the way it interprets the images and plays music from them. Instead of using the image as a spectrum, it reads it, pixel by pixel and creates a score from that. You can then choose instruments from a list that will play the notes of that score. Then you have ColourControls which sends out MIDI messages based on colours in the image, made by our very own Antimon. Other programs are Paint2Sound, and SonicPhoto, and there are bound to be a lot more alternatives out there as well. If you are into modular software, Max and PureData can do these things in real time, and a lot more things besides that. Finally, your audio editor may let you "pencil in" a waveform directly with the mouse. While you may have trouble composing anything of length in this way, making single cycle waveforms is easy enough. If you have some time on your hands you could try making some short drum hits too. It helps to have a look at real waveforms for an idea of what you are up against, but it does not get much more DIY than that. FFT and additive synthesis from images
The wonderful mathematical mechanics behind what we refer to as FFT (Fast Fourier Transform) has given us many ways of processing audio, including the mp3 file format. Perhaps one of the easiest ways to visualize (sorry) what FFT does is to use an image to sound converting program. What most of these programs do, is to "read" the image from left to right, using top to bottom as frequency range. At the top lies the high frequencies, and at the bottom the low ones. It could be seen as the most literal type of musical sound score there is, since there is a very close correlation between what you see and what you hear. When a program creates sound from an image using FFT it splits the image into horizontal rows and analyses each row to create a spectrum, or a number of parallel bands which represent the audio. The more bands you use, the more detail you will hear in the end result. Depending on brightness and colour, it then applies a volume (and some times pan) envelope to each band, and then combines all the bands together to form a complete sound. Some programs create a complex, constantly changing filter out of this spectrum and sends a broad band noise signal through it, other programs use one oscillator per band to create and additive sound out of it. Some programs will give you a choice between both. Some common parameters that you will encounter in the process of conversion are worth a mention. Normally you will be able to restrict the bandwidth of the end result, with a low and high frequency. It is usually wise to stay within audio frequencies here, in other words 20 to 20.000 Hz. If you plan to place things in a mix later you might want to restrict the bandwidth further. An other common setting has to do with how the image is analyzed in frequency, i.e. linear or logarithmic. A linear interpretation will split the image into equally spaced intervals, frequency wise - whereas a log interpretation will "skew" the image so that the higher bands of the sound are spaced further apart than the lower ones. This interpretation is more in line with how we percieve sound. Other parameters will deal with how colors relate to panning and so on. One important parameter is brightness to volume/amplitude/gain, which will help you avoid overloads when all the bands are added together. You will probably find that you have to do a few passes to get the levels right. How long the audio file will be can some times be set by the user, but in some cases it will be a direct result of how big the image file is. In some instances you can use the length setting to create time stretched sounds. Using your image editor as effects unit
If you are one of the lucky ones who have a program that can import and export both audio and image files, you have to experiment with editing your sounds in something like Photoshop or Gimp! The Gimp is a cross-platform, free open source program that can do almost everything that Photoshop can, and will give you a whole new universe to play with in terms of sound effects. You will have to bounce the file between your two programs, but it shouldn't take you long to work out whether it is worth it! To give you some ideas, knowing that the image is read from left to right, using motion blur in the right direction will give you a reverb-like effect, except you could give it any angle, making it slowly rise or fall, or come in backwards into the sound like some weird reverse effect. Just plain blur will give you both reverse and normal reverb, and some added fuzziness where it points up and down in the image. Trying this on drums is effective. You can combine sounds in new ways, giving you convolution-like effects but with different results and longer files. Photosounder has this built into the program, so you would not have to export/import to hear what this sounds like. It is all about experimenting with layers in the image editor. If you have audio tracks and combine them using all the different techniques of an image editor (multiply, divide, burn, lighten only, etc etc) you already have a great deal of new and exciting effects to play with. If that sounds like a lot of work, try some simpler things, like adding contrast or playing with selections or gradients and try to guess what it will sound like. Using something that started its life as a sound - like an acoustic instrument for example - will probably give you a better idea of how the effect will work, rather than using a photo as a starting point, but feel free to attack it any which way you feel like. There are countless new possibilities waiting to be discovered here, and needless to say, there is a massive potential for making new personalised sounds, never heard before. It will take some trial and error but the payoff could be significant. If your audio editor has an option for displaying sound as a spectrum, an easy way to convert this to image is to take a sceen shot of it. It will not have the resolution of a full bandwith audio file but for experimentation it could prove useful. Paint your composition
If you don't have any means of converting a sound file to an image, you still have a lot of compositional resources available in a straight image-to-sound software, by means of painting lines on a blank canvas. I personally tend to like the sound of additive techniques better than the noise-into-filter approach for "musically" sounding tracks, but you can always treat the results to furter sonic manipulation no matter the starting point. Some programs, like AudioPaint, can import scala files to apply on its additive engine for fixed scales in microtonal shades. This is incredibly important if you don't want the music to sound too random and spacejazzed. With the upcoming revolution in touch screen technology I am sure there will be more to say on this way of composing soon enough. If you prefer to start with an actual image, I'm sure you will quickly latch on the the fact that large white areas will convert to loud, noisy sounds. An easy way to reduce noisy pictures is to use edge detect, which will normally make your image dark with just the edges of things marked out - perfect for long notes and blips. Some programs have this function built in, but you can easily do this in the aforementioned Gimp if not. If you are not ready to compose an entire work in image form, you can still use these programs to create samples, as a springboard to new instruments, or for example super complex filters for use with convolution. You can simply use these tips to expand on your arsenal of skills, and combining them with all other sorts of techniques will greatly add to your sound design chops. It is also very fun! It should be noted however, that one of the main drawbacks of creating sounds in this manner is resolution - or rather, lack of it. It normally takes a lot of time and effort to get highly detailed sounds that are on a par with what we are used to from computers these days... That said, things are always improving so maybe it is only a matter of time before high definition sounds from images become effortless and therefore mainstream. 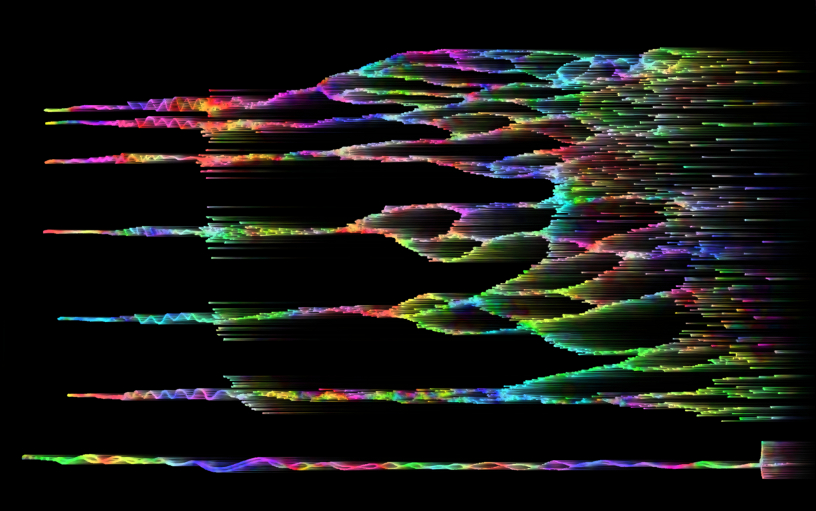 This score was hand drawn, then photographed and imported into Gimp, where it was cropped and inverted after some "wind" effects and random colours were added. No other effects or processing have been applied afterwards, they were just converted to mp3 files. If you want to know more, this Electronic Musician article was written a few years ago and is now slightly out of date, but there is still a lot of useful info there (click "Continue to article" in the top right corner). Muied Lumens |
Edit - History - Print - Recent Changes - Search Page last modified on 2013-10-04 19:35 [UTC-7] - 12748 views