| Author |
Message |
LektroiD

Joined: Aug 23, 2008
Posts: 1019
Location: Scottish Borders
Audio files: 2
G2 patch files: 2
|
 Posted: Thu Mar 12, 2009 4:46 am Post subject:
Stripboard Soundlab build Posted: Thu Mar 12, 2009 4:46 am Post subject:
Stripboard Soundlab build
Subject description: with step by step photos |
  |
|
This may be of use to the guys starting out; my build of the Soundlab in stages.
This thread is basically about the circuit build, and not so much about the front panel. Maybe someone will be kind enough to do a tutorial on panel making to compliment this thread.
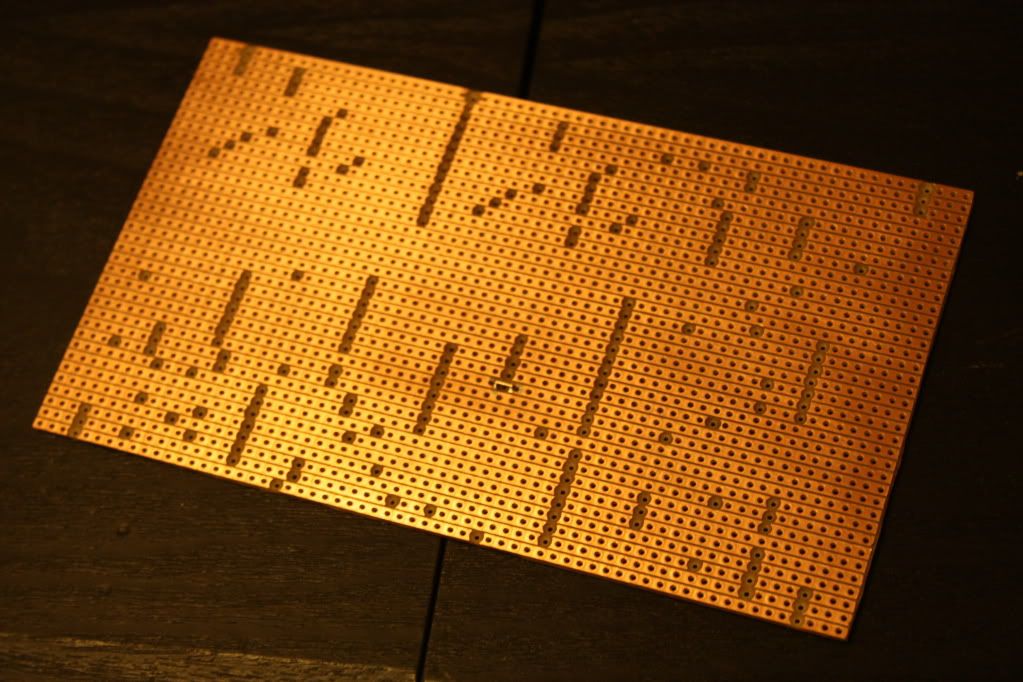
First off, I used a 4mm drill bit (slightly wider than the copper tracks of the stripboard) and gave it a couple of light turns to cut the necessary tracks. It is absolutely essential to get this right, double check, and double check again before you cut! As you will see I made a mistake on my board, but this was rectified by bridging the erroneous cut with a short piece of wire (tweezers are very useful for small jobs like this)
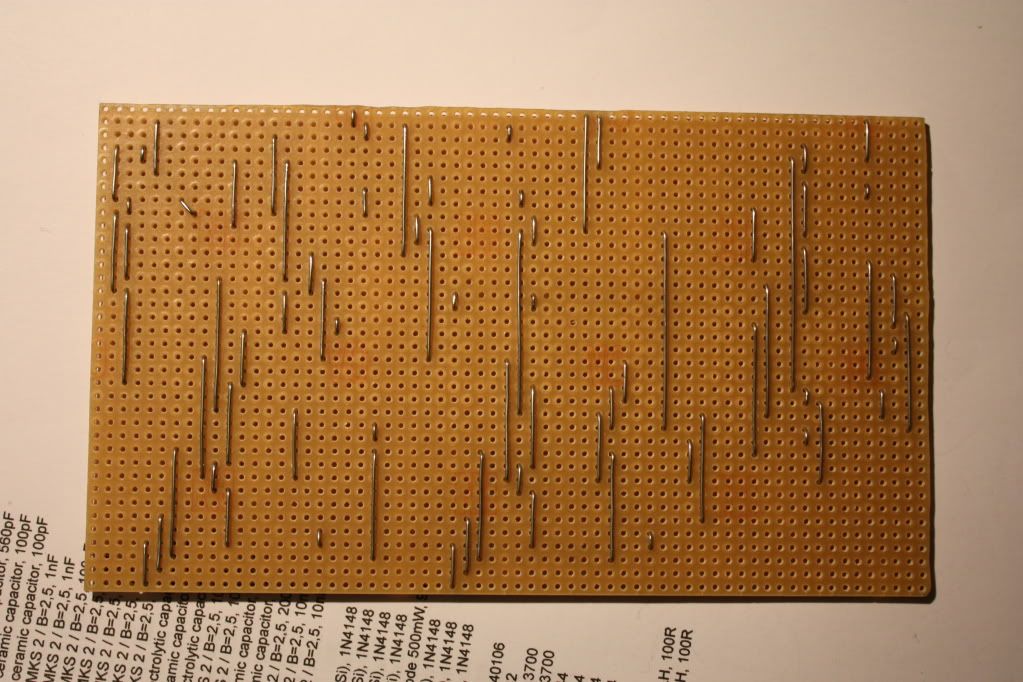
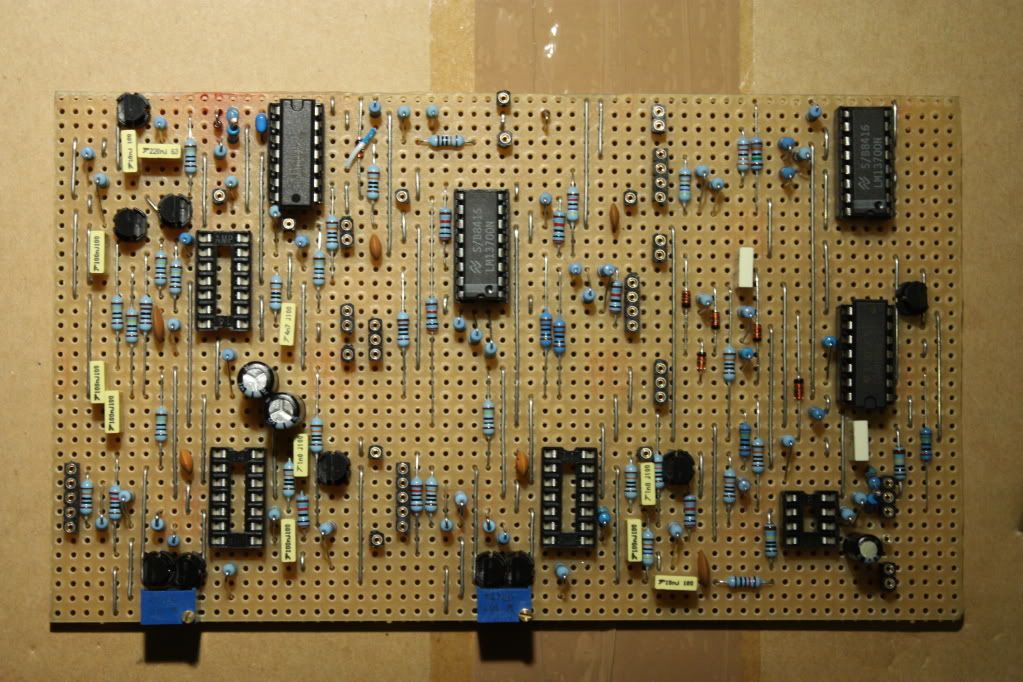
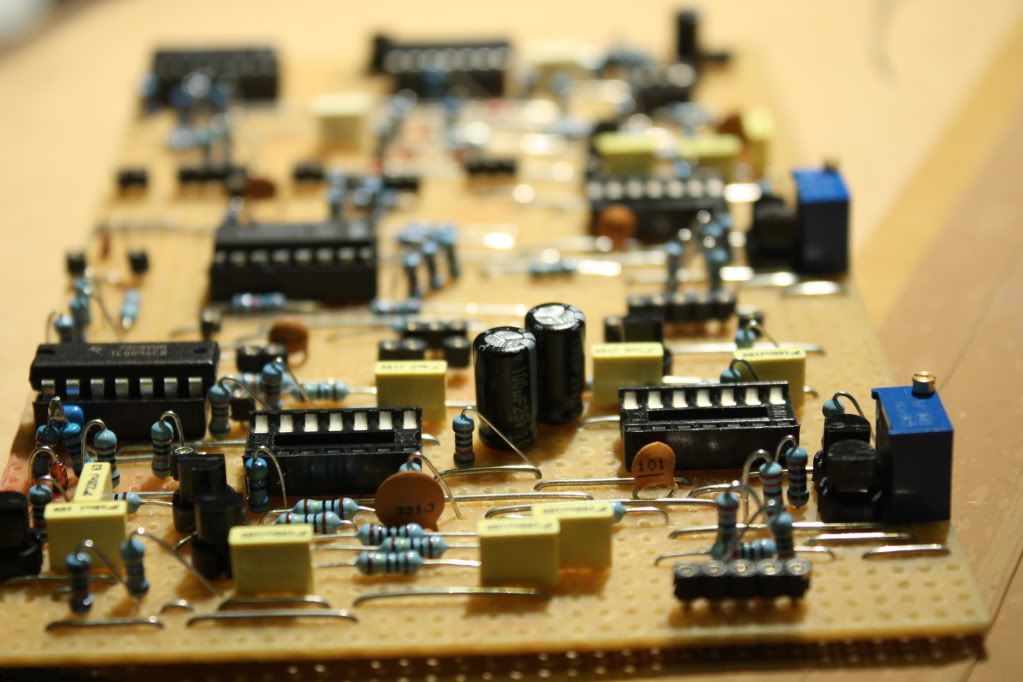
It is always good practice to populate every circuit in stages, starting with the lowest profile components first, in this case the wire links. I always pre-bend the pins before mounting.
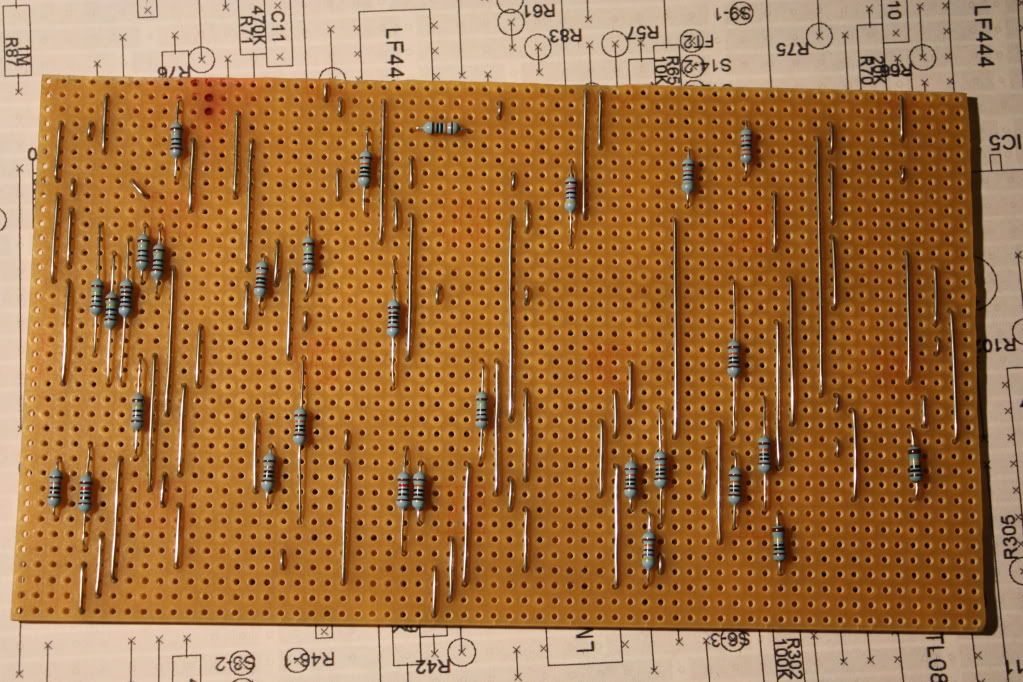
Next the horizontally mounted resistors. Notice they are all of the same orientation, makes it a lot easier should I need to troubleshoot later.
I then added the IC sockets and smaller capacitors, also I decided to use a female pin strip for connecting the panel components.
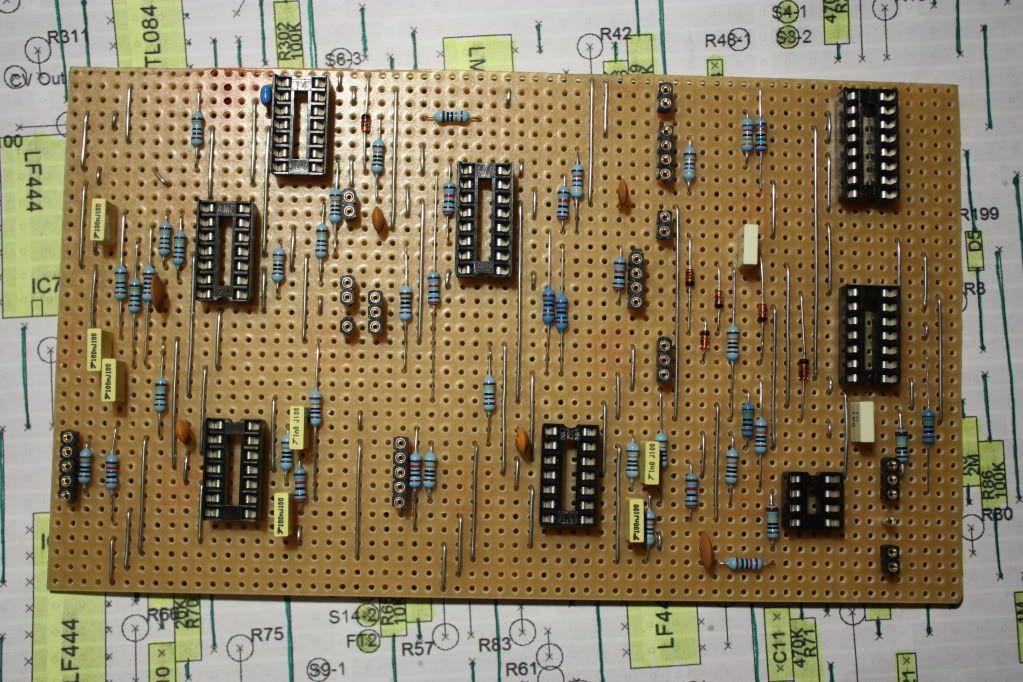
Continuing to add the components until the tallest components were in.
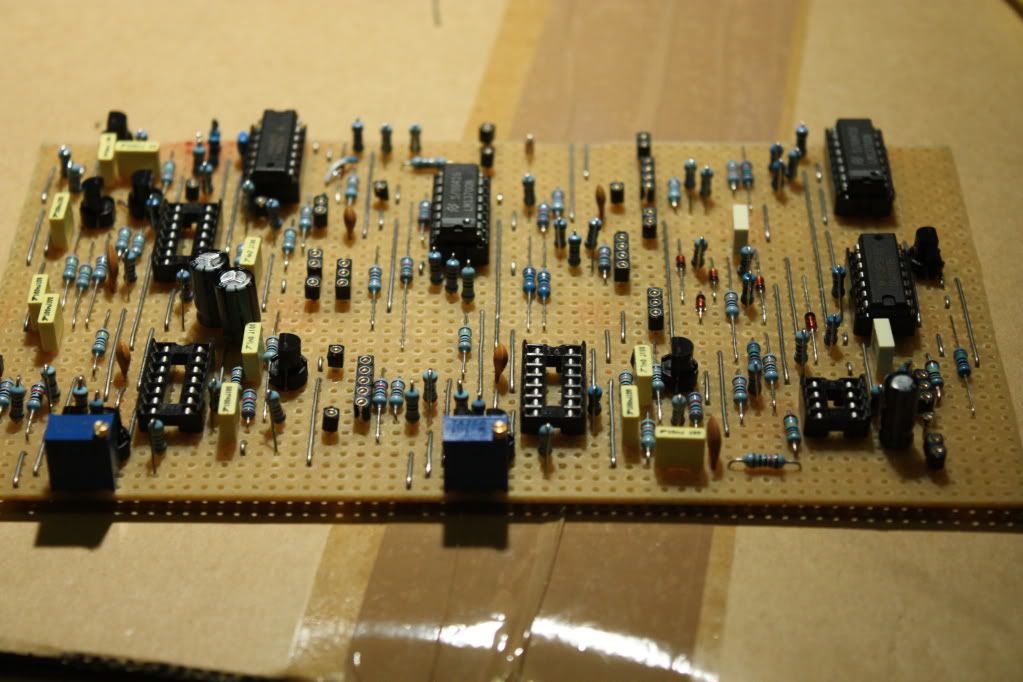
Next job was to wire the panel. I didn't have all the components to start with, but enough to be getting on with some of the wiring.

Once I got the required components, finished the panel wiring.
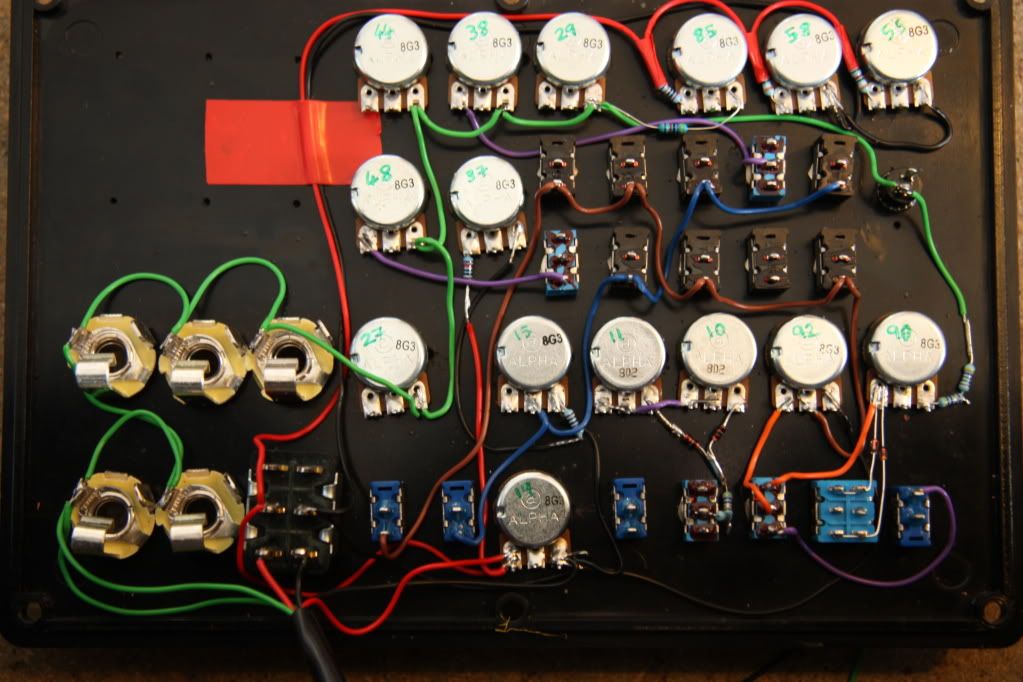
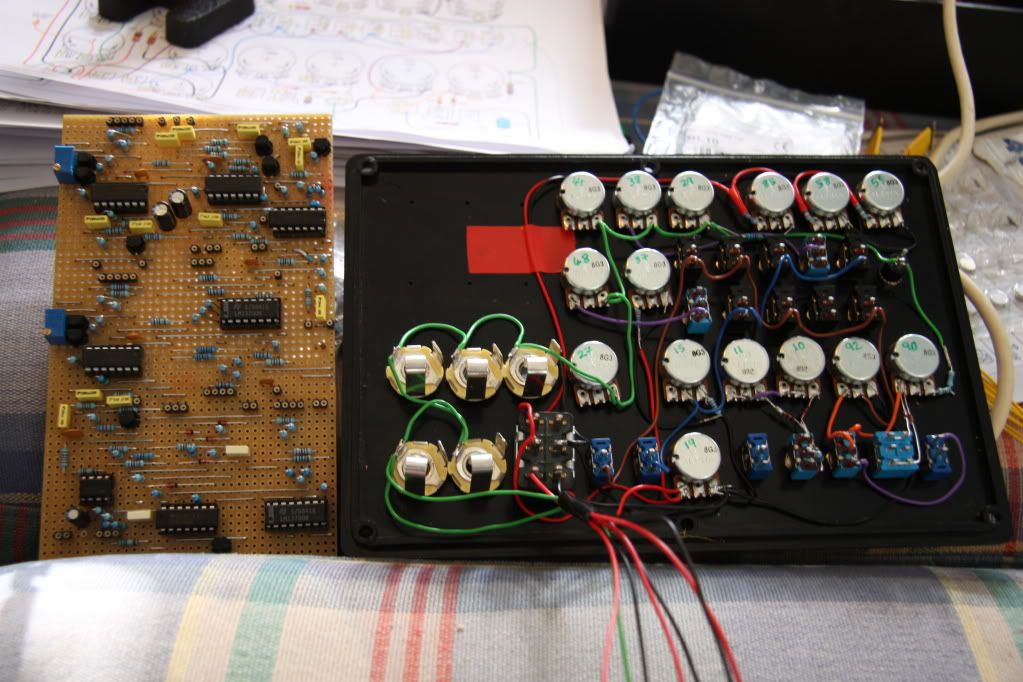
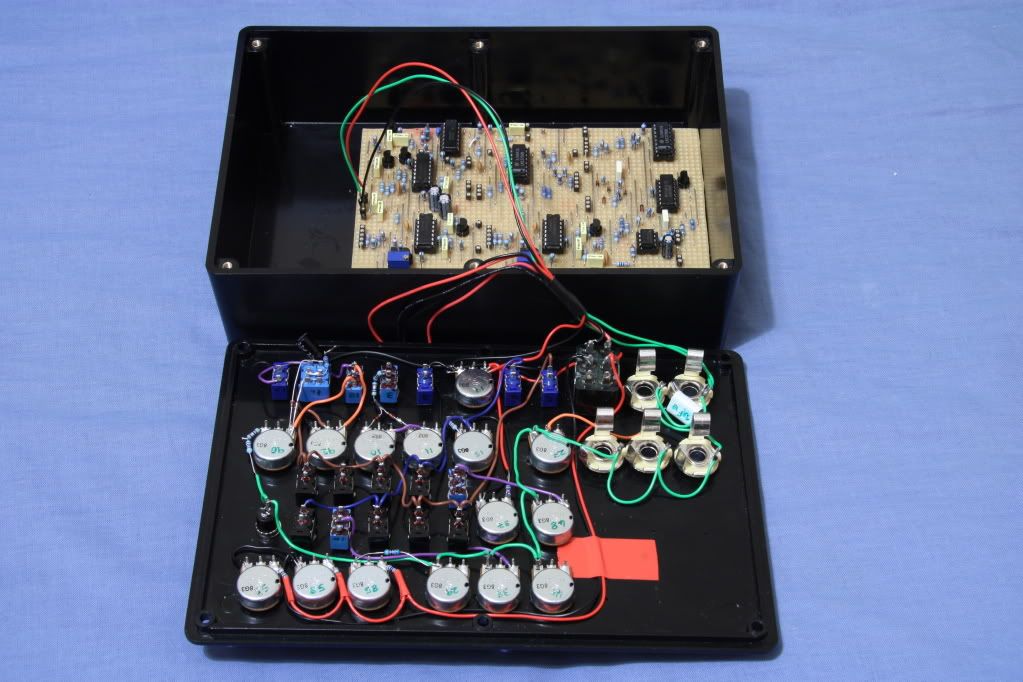
Added spaghetti.
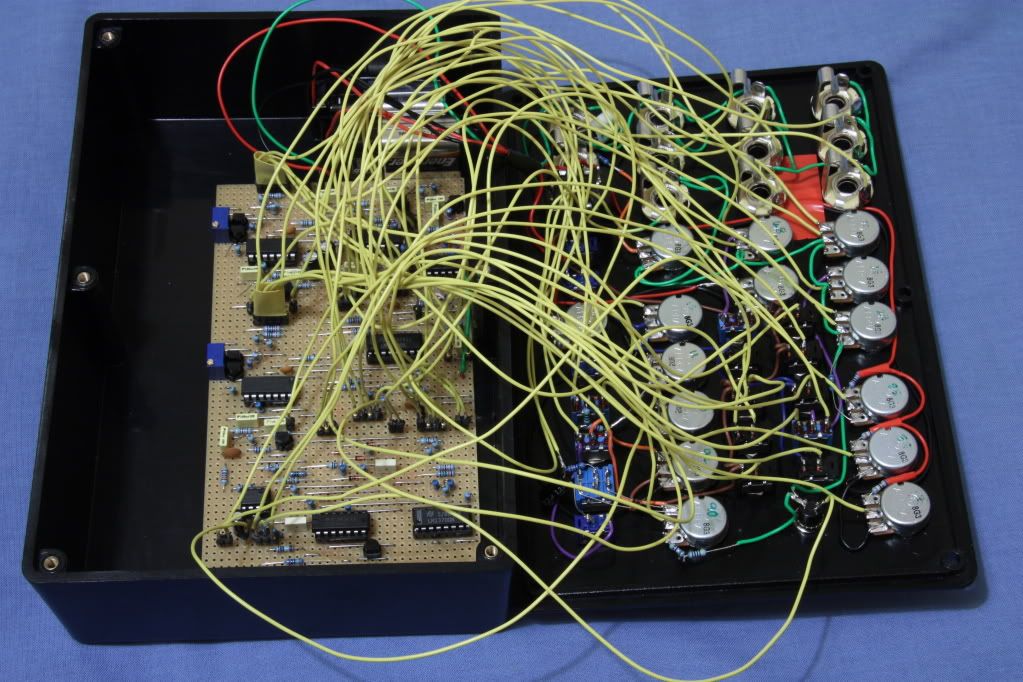
A few more sockets and she's up and running:
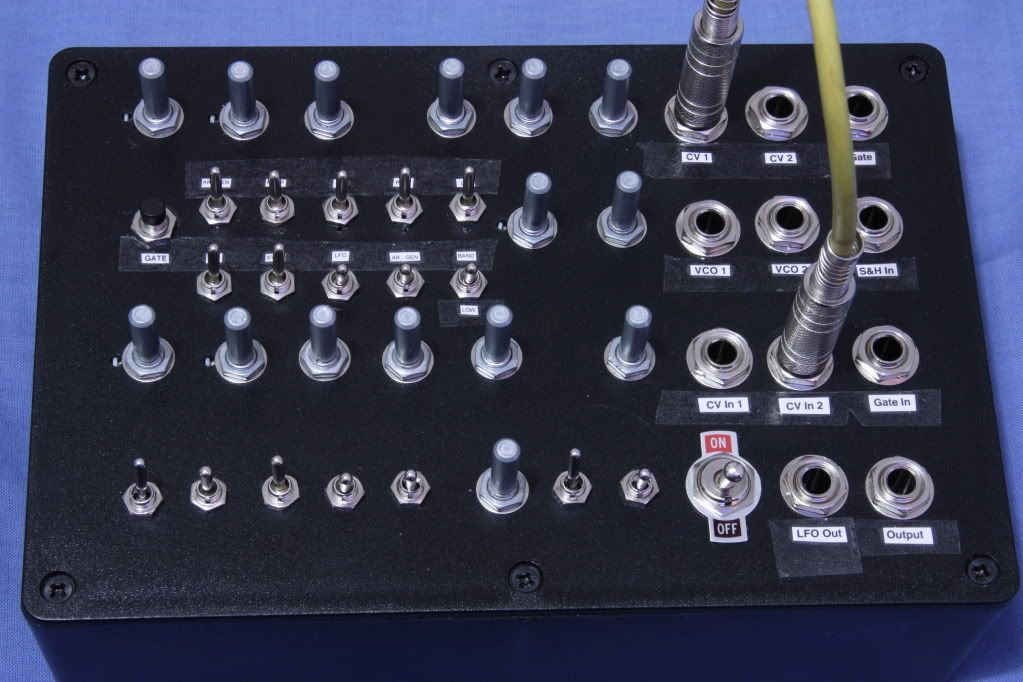
Special thanks to Ray Wilson, Uncle Krunkus and everyone involved for making this project possible.
YouTube video coming soon...
_________________
LektroiD |
|
|
Back to top
|
|
 |
Uncle Krunkus
Moderator

Joined: Jul 11, 2005
Posts: 4761
Location: Sydney, Australia
Audio files: 52
G2 patch files: 1
|
 Posted: Thu Mar 12, 2009 4:55 am Post subject: Posted: Thu Mar 12, 2009 4:55 am Post subject:
|
  |
|
Nice job LektroiD! 
_________________
What makes a space ours, is what we put there, and what we do there. |
|
|
Back to top
|
|
 |
blue hell
Site Admin

Joined: Apr 03, 2004
Posts: 24499
Location: The Netherlands, Enschede
Audio files: 298
G2 patch files: 320
|
 Posted: Thu Mar 12, 2009 6:09 am Post subject: Posted: Thu Mar 12, 2009 6:09 am Post subject:
|
  |
|
Or how a well structured path leads to success, good job indeed.
_________________
Jan
also .. could someone please turn down the thermostat a bit.
 |
|
|
Back to top
|
|
 |
v-un-v
Janitor


Joined: May 16, 2005
Posts: 8932
Location: Birmingham, England, UK
Audio files: 11
G2 patch files: 1
|
 Posted: Thu Mar 12, 2009 6:41 am Post subject: Posted: Thu Mar 12, 2009 6:41 am Post subject:
|
  |
|
very cool 
fwiw, I've got an exact replica upstairs of picture 2. It stopped there as this was the point when Ray's boards arrived. Now I also have a Ray board populated with resistors and erm.... not much else  
one day Tom. One day. 
_________________
ACHTUNG!
ALLES TURISTEN UND NONTEKNISCHEN LOOKENPEEPERS!
DAS KOMPUTERMASCHINE IST NICHT FÜR DER GEFINGERPOKEN UND MITTENGRABEN! ODERWISE IST EASY TO SCHNAPPEN DER SPRINGENWERK, BLOWENFUSEN UND POPPENCORKEN MIT SPITZENSPARKSEN.
IST NICHT FÜR GEWERKEN BEI DUMMKOPFEN. DER RUBBERNECKEN SIGHTSEEREN KEEPEN DAS COTTONPICKEN HÄNDER IN DAS POCKETS MUSS.
ZO RELAXEN UND WATSCHEN DER BLINKENLICHTEN. |
|
|
Back to top
|
|
 |
blue hell
Site Admin

Joined: Apr 03, 2004
Posts: 24499
Location: The Netherlands, Enschede
Audio files: 298
G2 patch files: 320
|
 Posted: Thu Mar 12, 2009 7:03 am Post subject: Posted: Thu Mar 12, 2009 7:03 am Post subject:
|
  |
|
| v-un-v wrote: | | fwiw, I've got an exact replica upstairs of picture 2. |
You could frame it for above the sofa I guess 
_________________
Jan
also .. could someone please turn down the thermostat a bit.
 |
|
|
Back to top
|
|
 |
LektroiD

Joined: Aug 23, 2008
Posts: 1019
Location: Scottish Borders
Audio files: 2
G2 patch files: 2
|
 Posted: Thu Mar 12, 2009 7:22 am Post subject: Posted: Thu Mar 12, 2009 7:22 am Post subject:
|
  |
|
| Blue Hell wrote: | | v-un-v wrote: | | fwiw, I've got an exact replica upstairs of picture 2. |
You could frame it for above the sofa I guess  |
I had a friend in the early '90s who had a broken TR606 on his wall.
_________________
LektroiD |
|
|
Back to top
|
|
 |
mosc
Site Admin

Joined: Jan 31, 2003
Posts: 18260
Location: Durham, NC
Audio files: 228
G2 patch files: 60
|
 Posted: Thu Mar 12, 2009 8:22 am Post subject: Posted: Thu Mar 12, 2009 8:22 am Post subject:
|
  |
|
A very nice job and nice pictures. This will help someone who is doing a stripboard project for the first time. Thanks.
_________________
--Howard
my music and other stuff |
|
|
Back to top
|
|
 |
v-un-v
Janitor


Joined: May 16, 2005
Posts: 8932
Location: Birmingham, England, UK
Audio files: 11
G2 patch files: 1
|
 Posted: Thu Mar 12, 2009 8:59 am Post subject: Posted: Thu Mar 12, 2009 8:59 am Post subject:
|
  |
|
| Blue Hell wrote: | | v-un-v wrote: | | fwiw, I've got an exact replica upstairs of picture 2. |
You could frame it for above the sofa I guess  |
Nope, I WILL finish it 
concentration has never been my forte 
_________________
ACHTUNG!
ALLES TURISTEN UND NONTEKNISCHEN LOOKENPEEPERS!
DAS KOMPUTERMASCHINE IST NICHT FÜR DER GEFINGERPOKEN UND MITTENGRABEN! ODERWISE IST EASY TO SCHNAPPEN DER SPRINGENWERK, BLOWENFUSEN UND POPPENCORKEN MIT SPITZENSPARKSEN.
IST NICHT FÜR GEWERKEN BEI DUMMKOPFEN. DER RUBBERNECKEN SIGHTSEEREN KEEPEN DAS COTTONPICKEN HÄNDER IN DAS POCKETS MUSS.
ZO RELAXEN UND WATSCHEN DER BLINKENLICHTEN. |
|
|
Back to top
|
|
 |
v-un-v
Janitor


Joined: May 16, 2005
Posts: 8932
Location: Birmingham, England, UK
Audio files: 11
G2 patch files: 1
|
 Posted: Thu Mar 12, 2009 9:00 am Post subject: Posted: Thu Mar 12, 2009 9:00 am Post subject:
|
  |
|
| mosc wrote: | | This will help someone who is doing a stripboard project for the first time. |
That'll be me then??   
_________________
ACHTUNG!
ALLES TURISTEN UND NONTEKNISCHEN LOOKENPEEPERS!
DAS KOMPUTERMASCHINE IST NICHT FÜR DER GEFINGERPOKEN UND MITTENGRABEN! ODERWISE IST EASY TO SCHNAPPEN DER SPRINGENWERK, BLOWENFUSEN UND POPPENCORKEN MIT SPITZENSPARKSEN.
IST NICHT FÜR GEWERKEN BEI DUMMKOPFEN. DER RUBBERNECKEN SIGHTSEEREN KEEPEN DAS COTTONPICKEN HÄNDER IN DAS POCKETS MUSS.
ZO RELAXEN UND WATSCHEN DER BLINKENLICHTEN. |
|
|
Back to top
|
|
 |
Uncle Krunkus
Moderator

Joined: Jul 11, 2005
Posts: 4761
Location: Sydney, Australia
Audio files: 52
G2 patch files: 1
|
 Posted: Thu Mar 12, 2009 3:13 pm Post subject: Posted: Thu Mar 12, 2009 3:13 pm Post subject:
|
  |
|
If it's any consolation Tom, I think the level of concentration required to get a stripboard that size working perfectly is something which comes and goes. I doubt I'd have the chops to even begin one these days! 
_________________
What makes a space ours, is what we put there, and what we do there. |
|
|
Back to top
|
|
 |
LektroiD

Joined: Aug 23, 2008
Posts: 1019
Location: Scottish Borders
Audio files: 2
G2 patch files: 2
|
|
|
Back to top
|
|
 |
LektroiD

Joined: Aug 23, 2008
Posts: 1019
Location: Scottish Borders
Audio files: 2
G2 patch files: 2
|
 Posted: Fri Sep 18, 2009 1:09 am Post subject: Posted: Fri Sep 18, 2009 1:09 am Post subject:
|
  |
|
in its current state (click for larger photo):

_________________
LektroiD |
|
|
Back to top
|
|
 |
Skrog Productions

Joined: Jan 07, 2009
Posts: 1220
Location: Scottish Borders
Audio files: 159
|
 Posted: Fri Sep 18, 2009 3:55 am Post subject: Posted: Fri Sep 18, 2009 3:55 am Post subject:
|
  |
|
very good build, well laid out from start to finish, my friend built the strip layout WSG and made such a good job that i commandeered it to use in Epicyclus project  he he he he |
|
|
Back to top
|
|
 |
|


