| Author |
Message |
Grumble

Joined: Nov 23, 2015
Posts: 1320
Location: Netherlands
Audio files: 30
|
 Posted: Tue Mar 31, 2020 3:34 pm Post subject: Posted: Tue Mar 31, 2020 3:34 pm Post subject:
|
  |
|
Nice, and the housing ,seems totaly appropriate to me 😁👍🏻
_________________
my synth |
|
|
Back to top
|
|
 |
Grumble
Joined: Nov 23, 2015
Posts: 1320
Location: Netherlands
Audio files: 30
|
|
|
Back to top
|
|
|
Grumble
Joined: Nov 23, 2015
Posts: 1320
Location: Netherlands
Audio files: 30
|
|
|
Back to top
|
|
|
Grumble
Joined: Nov 23, 2015
Posts: 1320
Location: Netherlands
Audio files: 30
|
|
|
Back to top
|
|
|
AlanP
Joined: Mar 11, 2014
Posts: 746
Location: New Zealand
Audio files: 41
|
| Posted: Fri Apr 24, 2020 2:13 pm Post subject:
|
|
|
 

This one's been on the backburner for awhile. VCF from the MS-10, using the Korg35 circuit. The input has far too much gain on it at the moment -- it's very easy to swamp the filter entirely, so nothing gets filtered at all. But it does work nicely once the input level is set correctly!
 
808 Snare circuit. Again, backburner... this one had a really embarassing mistake that caused it to be benched for a few years (a few, he says.) But now it works nicely. |
|
|
Back to top
|
|
|
Skrog Productions

Joined: Jan 07, 2009
Posts: 1226
Location: Scottish Borders
Audio files: 161
|
| Posted: Fri Apr 24, 2020 2:44 pm Post subject:
|
|
|
Nice builds  |
|
|
Back to top
|
|
|
AlanP
Joined: Mar 11, 2014
Posts: 746
Location: New Zealand
Audio files: 41
|
| Posted: Fri Apr 24, 2020 7:54 pm Post subject:
|
|
|
 
Hi-hat module, both open and closed hat. The sound... is not amazing, but it is vaguely hi-hat-like. |
|
|
Back to top
|
|
|
Skrog Productions
Joined: Jan 07, 2009
Posts: 1226
Location: Scottish Borders
Audio files: 161
|
| Posted: Tue Apr 28, 2020 3:45 am Post subject:
|
|
|
| Great you caught that tricky resistor Alan , glad it works fine now , nice build |
|
|
Back to top
|
|
|
PHOBoS

Joined: Jan 14, 2010
Posts: 5973
Location: Moon Base
Audio files: 709
|
|
|
Back to top
|
|
|
MapacheRaper

Joined: Feb 15, 2018
Posts: 166
Location: Spain
|
| Posted: Mon May 04, 2020 5:58 pm Post subject:
|
|
|
Fantastic builds, guys!
Grumble, how it´s going the sequencer? Do you have a thread for it anywhere? |
|
|
Back to top
|
|
|
Grumble
Joined: Nov 23, 2015
Posts: 1320
Location: Netherlands
Audio files: 30
|
| Posted: Tue May 05, 2020 4:36 am Post subject:
|
|
|
No, not yet
_________________
my synth |
|
|
Back to top
|
|
|
Grumble
Joined: Nov 23, 2015
Posts: 1320
Location: Netherlands
Audio files: 30
|
|
|
Back to top
|
|
|
Grumble
Joined: Nov 23, 2015
Posts: 1320
Location: Netherlands
Audio files: 30
|
|
|
Back to top
|
|
|
Grumble
Joined: Nov 23, 2015
Posts: 1320
Location: Netherlands
Audio files: 30
|
| Posted: Wed May 27, 2020 11:51 pm Post subject:
|
|
|
Eeprom programmer for 28c512 eeprom (64k x 8bit)


_________________
my synth |
|
|
Back to top
|
|
|
kaputtpanzer

Joined: Nov 02, 2009
Posts: 139
Location: Cologne
Audio files: 15
|
| Posted: Tue Jun 23, 2020 5:17 am Post subject:
|
|
|
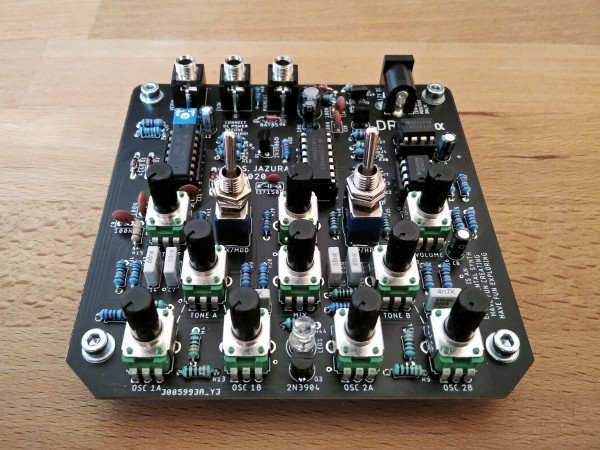
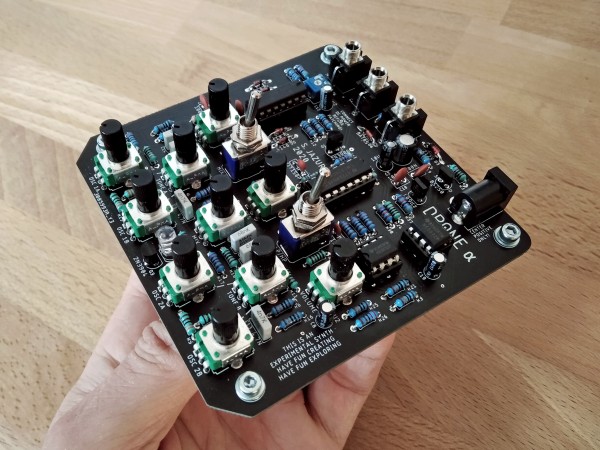
Here is a little drone synth I made. It is just a prototype now, but works quite well (but there are one or two little issues). There is a VCF included which is inspired by the Oberheim SEM VCF and it sounds pretty good. I added a little demo clip (sorry for the poor quality)...
| Description: |
|
| Filesize: |
1.61 MB |
| Viewed: |
257 Time(s) |
| This image has been reduced to fit the page. Click on it to enlarge. |
|
| Description: |
|
| Filesize: |
1.46 MB |
| Viewed: |
239 Time(s) |
| This image has been reduced to fit the page. Click on it to enlarge. |
|
| Description: |
|

Download (listen) |
| Filename: |
dronea.mp4 |
| Filesize: |
40.64 MB |
| Downloaded: |
284 Time(s) |
|
|
|
Back to top
|
|
|
raccooneatingcacti
Joined: Sep 02, 2020
Posts: 10
Location: US, North Pacific
|
Posted: Fri Sep 04, 2020 7:31 pm Post subject:
My terrible DIY modules so far
Subject description: Please send perfboard design help |
|
|
I have lots to learn... Elders of perfboard circuit design, bless me with your knowledge!(or a link to it)
I know these images will disturb most if not all of you... but sadly, this is my current definition of "success."
| Description: |
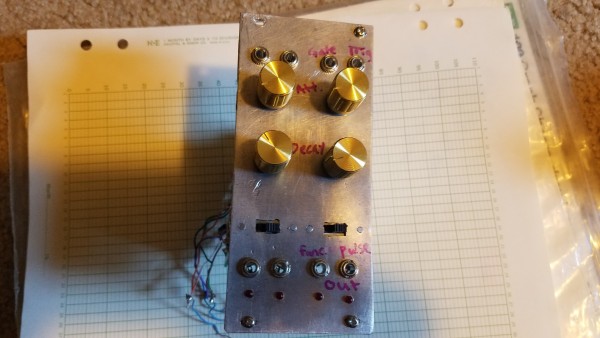
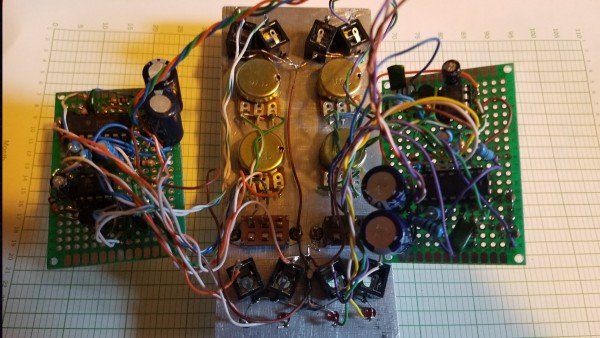
| two thomas henry 555 attack decay envelope generators, with a modification that allows the envelope to retrigger. then I got Ray Wilson's MAKE: synth diy book and it had a much more elegant solution. |
|
| Filesize: |
589.39 KB |
| Viewed: |
196 Time(s) |
| This image has been reduced to fit the page. Click on it to enlarge. |
|
| Description: |
|
| Filesize: |
727.47 KB |
| Viewed: |
233 Time(s) |
| This image has been reduced to fit the page. Click on it to enlarge. |
|
| Description: |
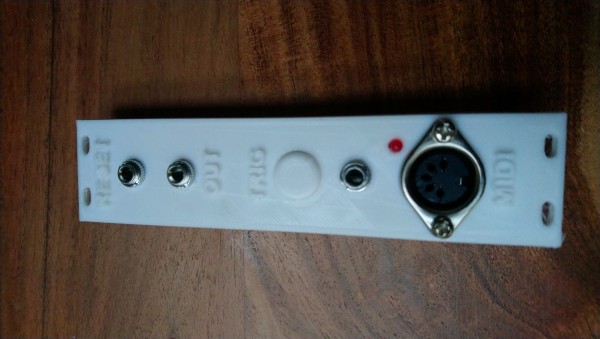
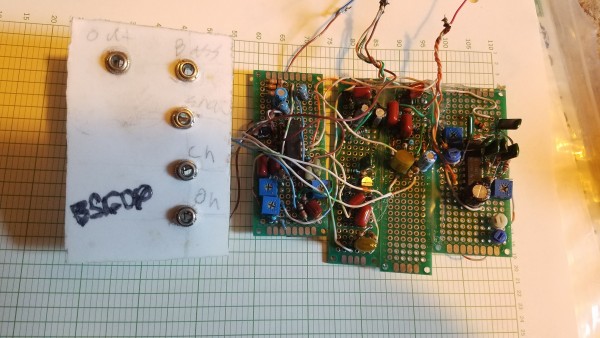
| Drum voices using the T network design. between the noise circuit for the hihat and the cd40106 cymbal circuit, the output is very noisy. |
|
| Filesize: |
745.04 KB |
| Viewed: |
232 Time(s) |
| This image has been reduced to fit the page. Click on it to enlarge. |
|
| Description: |
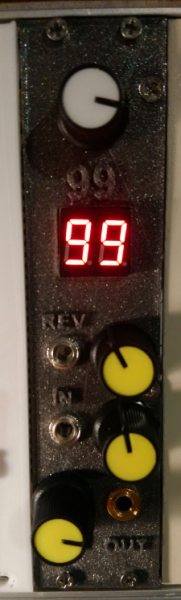
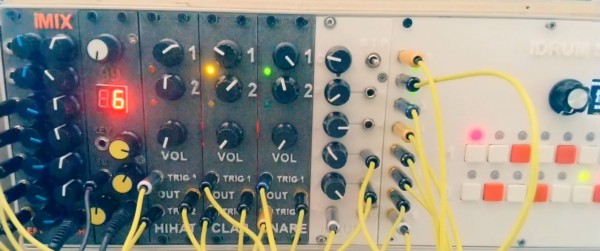
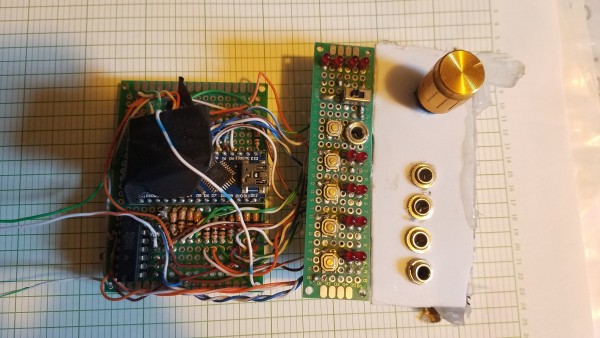
| 4 channel 16 step trigger sequencer, made to trigger drums. Arduino, wrote the code myself, so I'm sure it's not very optimal. The potentiometer feeds an analog input on the arduino, which determines the step position. step position is displayed in binary |
|
| Filesize: |
703.33 KB |
| Viewed: |
212 Time(s) |
| This image has been reduced to fit the page. Click on it to enlarge. |
|
| Description: |
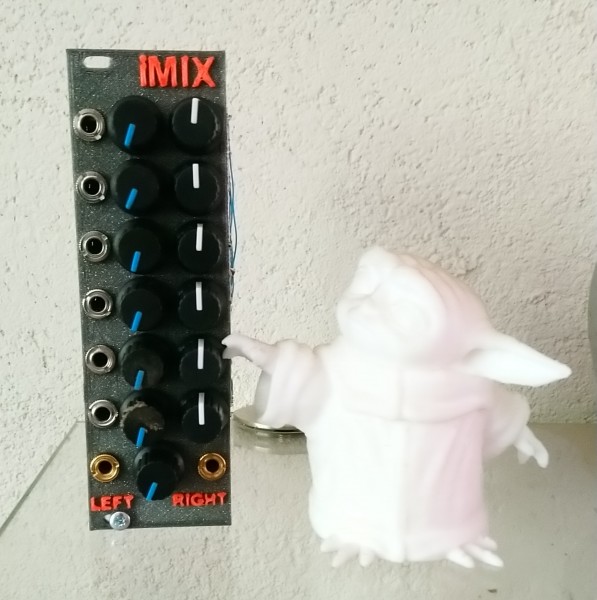
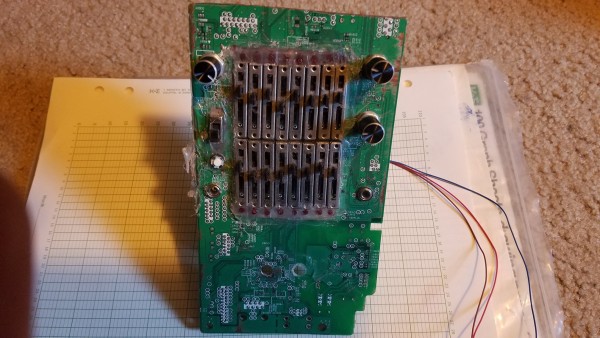
| First successful attempt at a CV step sequencer. two CD4051s with a binary counter, basically. the two knobs on the right scale the CV and apply an offset, respectively. |
|
| Filesize: |
811.16 KB |
| Viewed: |
212 Time(s) |
| This image has been reduced to fit the page. Click on it to enlarge. |
|
|
|
|
Back to top
|
|
|
raccooneatingcacti
Joined: Sep 02, 2020
Posts: 10
Location: US, North Pacific
|
| Posted: Fri Sep 04, 2020 7:38 pm Post subject:
|
|
|
| Everyone's projects are looking great! So many ideas here, it really makes me want to step it up! |
|
|
Back to top
|
|
|
PHOBoS
Joined: Jan 14, 2010
Posts: 5973
Location: Moon Base
Audio files: 709
|
Posted: Mon Sep 07, 2020 6:30 am Post subject:
Re: My terrible DIY modules so far
Subject description: Please send perfboard design help |
|
|
| raccooneatingcacti wrote: | I have lots to learn... Elders of perfboard circuit design, bless me with your knowledge!(or a link to it)
I know these images will disturb most if not all of you... but sadly, this is my current definition of "success." |
not disturbing at all and like the way you use those PCBs as frontpanel 
The wiring could use bit of tidying up but for the rest it's not bad at all.
Can't see the underside of the PCBs though.
_________________
"My perf, it's full of holes!"
http://phobos.000space.com/
SoundCloud BandCamp MixCloud Stickney Synthyards Captain Collider Twitch YouTube |
|
|
Back to top
|
|
|
PHOBoS
Joined: Jan 14, 2010
Posts: 5973
Location: Moon Base
Audio files: 709
|
| Posted: Mon Sep 07, 2020 6:35 am Post subject:
|
|
|
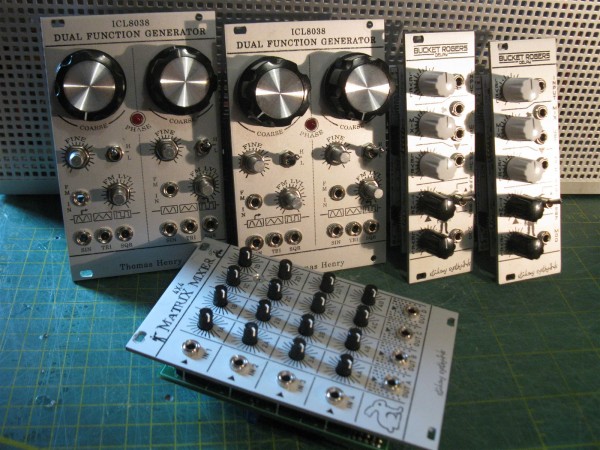
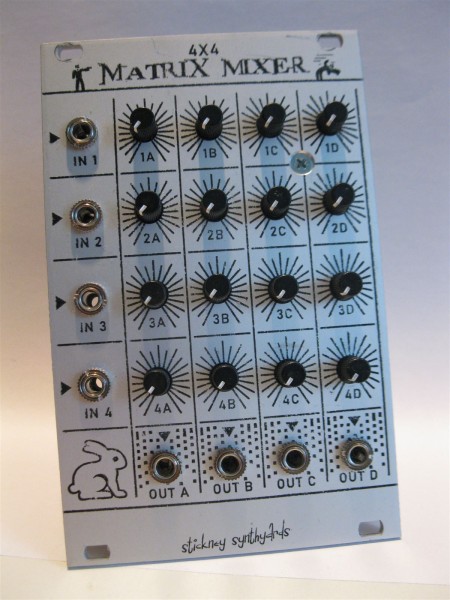
I had/have some time of from work so did some soldering and build 5 new modules.
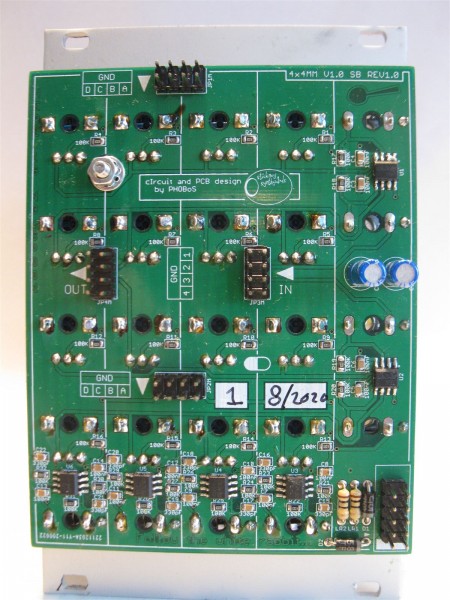
1x 4x4 Matrix mixer, my first SMD PCB design (can be expanded)
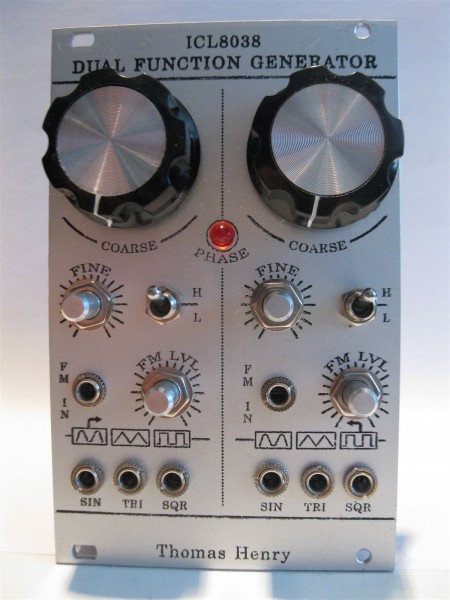
2x ICL8038 Dual function generator using a design by Thomas Henry
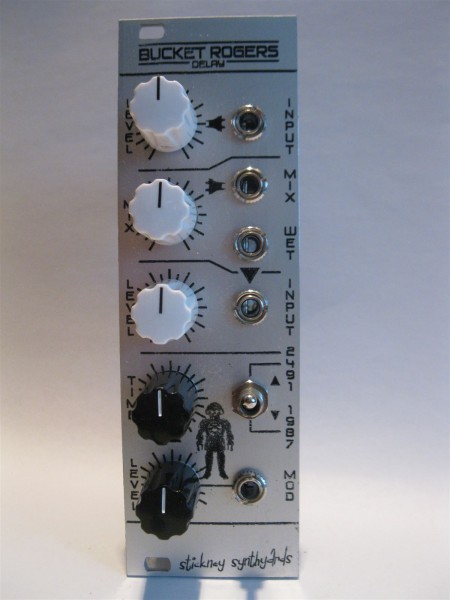
2x Bucket Rogers Delay with an MN3007 BBD chip (thanks for those Cfish!!)
Played around with them yesterday which turned out quite different than I was expecting.
You can find the video on twitch (for the next 14 days): https://www.twitch.tv/videos/733559035
and I will probably post the audio (starting from around 1:40:00) here on EM later.
| Description: |
|
| Filesize: |
321.91 KB |
| Viewed: |
195 Time(s) |
| This image has been reduced to fit the page. Click on it to enlarge. |
|
| Description: |
|
| Filesize: |
243.29 KB |
| Viewed: |
214 Time(s) |
| This image has been reduced to fit the page. Click on it to enlarge. |
|
| Description: |
|
| Filesize: |
306.83 KB |
| Viewed: |
218 Time(s) |
| This image has been reduced to fit the page. Click on it to enlarge. |
|
| Description: |
|
| Filesize: |
220.13 KB |
| Viewed: |
199 Time(s) |
| This image has been reduced to fit the page. Click on it to enlarge. |
|
| Description: |
|
| Filesize: |
278.96 KB |
| Viewed: |
215 Time(s) |
| This image has been reduced to fit the page. Click on it to enlarge. |

|
_________________
"My perf, it's full of holes!"
http://phobos.000space.com/
SoundCloud BandCamp MixCloud Stickney Synthyards Captain Collider Twitch YouTube
Last edited by PHOBoS on Mon Sep 07, 2020 6:45 am; edited 4 times in total |
|
|
Back to top
|
|
|
PHOBoS
Joined: Jan 14, 2010
Posts: 5973
Location: Moon Base
Audio files: 709
|
| Posted: Mon Sep 07, 2020 6:38 am Post subject:
BBDBBDBBDBBDBBDBBDBBDBBD |
|
|
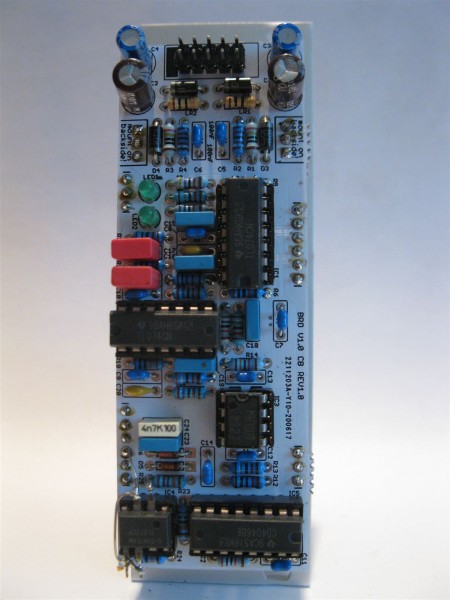
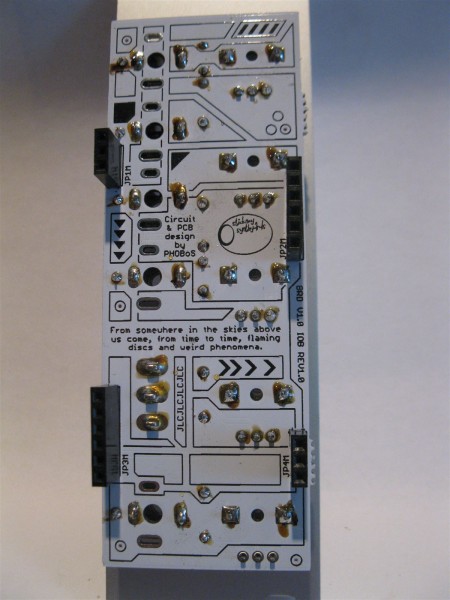
And the Bucket Roger Delay.
I didn't notice the opamps being upside down in the schematic, so I had to fix that afterwards by soldering directly to the opamp pins.  . .
| Description: |
|
| Filesize: |
154.64 KB |
| Viewed: |
207 Time(s) |
| This image has been reduced to fit the page. Click on it to enlarge. |
|
| Description: |
|
| Filesize: |
185.56 KB |
| Viewed: |
210 Time(s) |
| This image has been reduced to fit the page. Click on it to enlarge. |
|
| Description: |
|
| Filesize: |
210.15 KB |
| Viewed: |
194 Time(s) |
| This image has been reduced to fit the page. Click on it to enlarge. |
|
_________________
"My perf, it's full of holes!"
http://phobos.000space.com/
SoundCloud BandCamp MixCloud Stickney Synthyards Captain Collider Twitch YouTube |
|
|
Back to top
|
|
|
raccooneatingcacti
Joined: Sep 02, 2020
Posts: 10
Location: US, North Pacific
|
Posted: Mon Sep 07, 2020 6:45 am Post subject:
Re: My terrible DIY modules so far
Subject description: Please send perfboard design help |
|
|
Thanks, Phobos! I used an old printer PCB for the sequencer panel. I hadn't settled on using the Eurorack 3U standard at that point. I don't really recommend it, There was some pretty nasty dust in the cutting process.
The underside of the boards? but that's where all the shame hides! I can get some pictures later today, haha. And yes the wiring is very bad at this point... I always intend on shortening the wires after getting confirmation that the modules work, but I haven't gotten around to that yet. I think using some standoff posts would be a huge improvement too.
I just finished a Thomas Henry VCF-1 perfboard yesterday. The first board I did all the components were crammed in super tight and every resistor was standing straight up. impossible to troubleshoot. Tried to save space and ruined a whole board! I've decided to lay things out and go really slow from this point on. |
|
|
Back to top
|
|
|
raccooneatingcacti
Joined: Sep 02, 2020
Posts: 10
Location: US, North Pacific
|
| Posted: Mon Sep 07, 2020 6:53 am Post subject:
|
|
|
Wow, Phobos. Nice boards and panels! Is the solder mask opacity an aesthetic choice or does it serve a purpose? I've been wanting to get into PCB design but that seems like a whole new layer of troubleshooting. I've only done some very small boards by cutting traces out on a copper clad board with an exacto blade.
are there pictures of your complete system somewhere? I get the impression that it's massive. |
|
|
Back to top
|
|
|
PHOBoS
Joined: Jan 14, 2010
Posts: 5973
Location: Moon Base
Audio files: 709
|
| Posted: Mon Sep 07, 2020 11:40 am Post subject:
|
|
|
| raccooneatingcacti wrote: | | Wow, Phobos. Nice boards and panels! Is the solder mask opacity an aesthetic choice or does it serve a purpose? |
Not sure if you are referring to the effect the copper pour between the traces has which will make it a bit harder to see the traces on the photos,
or the actual solder mask. Solder mask is standard when ordering PCBs (I think it's more expensive without) it's useful when soldering especially
with SMD since it reduces the change of shorts between pads. If you look at the top right of the Matix Mixer PCB there's an opamp which has 2 pins
bridged with some solder. For some reason the 2 opamps on the right side both didn't work so I had to replace them. In doing so I lost some of the
soldermask between those pins, and since they are connected with a trace the solder happily stuck to it. I could have tried to remove it a bit but that
would have probably done more harm than good.
The color choice on the other hand is for aesthetic reasons:
The Matrix Mixer had to be green of course.
I choose blue for the function generator because of all the blue components, especially all the blue pots.
For the Bucket Rogers Delay I looked up some images of Buck Rogers and his ship and saw a lot of white/grey so I went with that.
Usually I don't use the white solder mask as the black silkscreen always seems of lesser quality, it also obscures the traces a lot
(maybe that's what you were referring too) and it looks a bit messy with the solder flux. But for this one I made an exception.
I still like using perfboard but that doesn't really work well with SMD and if you need a couple of boards (I have 4 BBD chips and
10 function generator chips) it's not only less tedious than using perf but actually cheaper.
| Quote: | | I've been wanting to get into PCB design but that seems like a whole new layer of troubleshooting. I've only done some very small boards by cutting traces out on a copper clad board with an exacto blade. |
I've always been designing PCBs. initially I used to etch them myself but later switched to perf but for those I make a design too using an old free
version of SprintLayout. For these PCB designs I use the free version of Eagle and after watching 1 or 2 videos it wasn't too difficult to do but if you
start out I would recommend KiCAD or something else. The limitations of the free eagle version can be annoying and it now comes bundled with fusion
360 for which you need a subscription. A nice thing with eagle and I am pretty sure most PCB software, is that you can link the schematic and the PCB
so it will show you what to connect to another. You could even use an auto router but I've never made use of that myself, I enjoy the puzzle.
| Quote: | | are there pictures of your complete system somewhere? I get the impression that it's massive. |
not a very recent one although it hasn't changed much but there is a nice one here.
A lot of things end up in boxes because I just don't have the space for it. But once in a while I pick something out to play with.
You could also check my youtube and twitch channels for some recent videos but they aren't very clear.
_________________
"My perf, it's full of holes!"
http://phobos.000space.com/
SoundCloud BandCamp MixCloud Stickney Synthyards Captain Collider Twitch YouTube |
|
|
Back to top
|
|
|
raccooneatingcacti
Joined: Sep 02, 2020
Posts: 10
Location: US, North Pacific
|
| Posted: Mon Sep 07, 2020 2:02 pm Post subject:
|
|
|
| PHOBoS wrote: |
if you start out I would recommend KiCAD or something else. |
Thanks for the tip, I'm going to give that a try. Any suggestions on where to have boards made?
Looks awesome, looks like you could get lost for weeks in there. I'm hoping to fill two rows of 60 hp 3U tall, for starters.
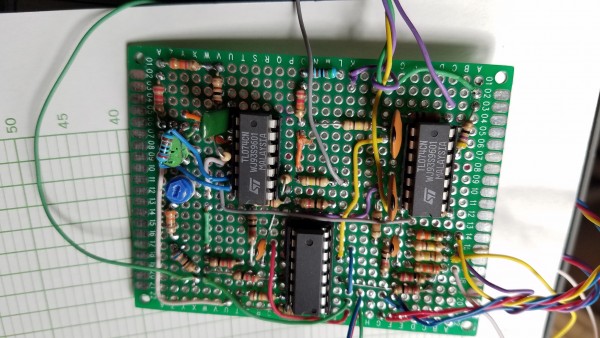
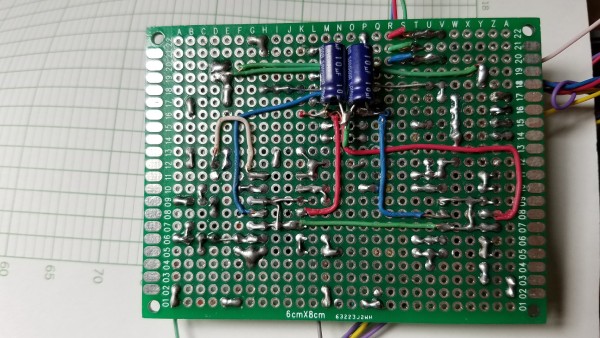
I added pictures of the front and back of the Thomas Henry VCF that I finished the other day. I really took the extra time to lay the components and jumper wires out as clearly as I could. The wires going to the panel are still a little messy but it works.
| Description: |
|
| Filesize: |
697.93 KB |
| Viewed: |
200 Time(s) |
| This image has been reduced to fit the page. Click on it to enlarge. |
|
| Description: |
|
| Filesize: |
900.05 KB |
| Viewed: |
231 Time(s) |
| This image has been reduced to fit the page. Click on it to enlarge. |
|
|
|
|
Back to top
|
|
|
elmegil

Joined: Mar 20, 2012
Posts: 2179
Location: Chicago
Audio files: 16
|
| Posted: Mon Sep 07, 2020 5:29 pm Post subject:
|
|
|
| raccooneatingcacti wrote: | | PHOBoS wrote: |
if you start out I would recommend KiCAD or something else. |
Thanks for the tip, I'm going to give that a try. Any suggestions on where to have boards made?
|
I've been using AllPCB, a lot of folks I know recommend JLC PCB, there's a site called "pcbshopper.com" that lets you compare the commonly used fabs with the details you want for your designs. |
|
|
Back to top
|
|
|
|

 Forum index » DIY Hardware and Software