| Author |
Message |
Randaleem
Joined: May 17, 2007
Posts: 456
Location: Northern CA, USA
|
 Posted: Wed Oct 03, 2007 12:14 pm Post subject:
Schaeffer, Front panel Designers tips and tricks Posted: Wed Oct 03, 2007 12:14 pm Post subject:
Schaeffer, Front panel Designers tips and tricks |
  |
|
Hi to the electro-music.community,
A question just asked by Norman in another thread about fpd files has prompted this topic.
It occured to me that while I know a couple things you can do to minimise the price of panels made using Schaeffer and/or Front Panel Express...
I'm also quite sure that the community as a whole knows a great many more ways to use and optimise this design program and the service it is attached to?
So here is a topic for hints, tricks and helps when using the program and also the service itself.
Kind regards, Hoping to learn many new things!
Randal |
|
|
Back to top
|
|
 |
ultra
Joined: Dec 04, 2006
Posts: 55
Location: oshkosh, wi
|
| Posted: Thu Oct 04, 2007 12:20 pm Post subject:
|
|
|
hi.
up until a couple days ago i was using front panel designer for my panel designs. i was originally going to use fpe for my panels, but since then my girlfriend and i have both started school and she, being in the welding program, has access to a waterjet machine so now i'm designing in illustrator and having her cut them.
anyway, i found a couple of ways to reduce prices, but i'm not sure there are a lot. you can definitely send in your own panel to cut the costs. a lot of rack boxes come with quality panels anyway (par-metal in the united states is one). under the panel options, there is the option for "customer's material". selecting this option can show you what you'll save. you could also elect not to have it painted and paint it yourself. also, etching adds a lot to the cost, so consider having only the cutting done by fpe and have your panel silkscreened somewhere.
if you must engrave, there is another way to set it up. i'm recalling this from memory and didn't totally understand this in the first place, but when you put engraved text on a panel, it'll price each engraving individually. i guess there is a way to create an image that includes all the engraving and add it to the panel. then the pricing will look at it all as a single etching. again, i don't completely understand this. it's something i saw in a post somewhere and perhaps somebody else can help make more sense of this.
hope this helps,
ultra |
|
|
Back to top
|
|
|
wooster

Joined: Jul 25, 2007
Posts: 63
Location: Austin, TX
|
| Posted: Thu Oct 04, 2007 2:00 pm Post subject:
|
|
|
I've been doing three things to save cost:
1) Don't infill engravings. I think it looks okay without infilling. My question for the group would be, is it going to rust/tarnish without this?
2) Use HPGL engravings. I do all the layout in Front Designer, export to HPGL and then import it into FPE. This will reduce the cost by a lot. Front Designer is a better design tool anyway. I mark drillings in Front Designer with a '+' mark in a different engraving thickness from the text and lines so I can delete them all at once after I have added the holes.
3) Combine multiple designs into one panel. This will save on some of the fixed costs like the frame.
I've done three 6U wide MOTM height panels with lots of text, tick marks, and drillings (and some square holes) for about $85 each. Each panel has 3-5 modules on it. |
|
|
Back to top
|
|
|
fonik

Joined: Jun 07, 2006
Posts: 3950
Location: Germany
Audio files: 23
|
| Posted: Thu Oct 04, 2007 3:18 pm Post subject:
|
|
|
1st as already mentioned use one text object with multiple rows for text in columns.
2nd use hpgl for more detailed graphics (you pay per object and per size so you are cheaper with hpgl for scales, symbols and so on...)
3rd omit color fill for engravings. here we have two options: for my klee, soundlab and first two cabinets of modular i simply used black anodized aluminium. for the current cabinet i use lacquer stik fill in paint.
for the fpd-files visit my site...
front panels with lacquer stik fill in paint:

black anodized front panels:


green anodized klee2 panel:

_________________

cheers,
matthias
____________
Big Boss at fonitronik
Tech Buddy at Random*Source |
|
|
Back to top
|
|
|
State Machine
Janitor


Joined: Apr 17, 2006
Posts: 2810
Location: New York
Audio files: 24
|
| Posted: Fri Oct 05, 2007 6:51 am Post subject:
|
|
|
| Quote: | | front panels with lacquer stik fill in paint: |
First, Randel. thanks for starting this thread, it has been long over due.
second,
Fonik,
I really want to hear more about this fill in process. Could you elaborate a bit on this or point me to a thread in which you may have explained this process?
Thanks !
Bill |
|
|
Back to top
|
|
|
State Machine
Janitor
Joined: Apr 17, 2006
Posts: 2810
Location: New York
Audio files: 24
|
| Posted: Fri Oct 05, 2007 6:56 am Post subject:
|
|
|
| Quote: | | Use HPGL engravings. I do all the layout in Front Designer, export to HPGL and then import it into FPE |
I most agree with this statement. "Front Panel Designer" is severely lacking in the graphics department. I also have "Front Designer" for doing some of my graphics objects then export as HPGL.
Bill |
|
|
Back to top
|
|
|
norman phay

Joined: Jun 29, 2007
Posts: 176
Location: North-East England
Audio files: 1
|
| Posted: Fri Oct 05, 2007 7:46 am Post subject:
|
|
|
| Is this "front designer" a freeware/shareware app? Obviously I am going to need a prog that exports hgpl files. |
|
|
Back to top
|
|
|
norman phay
Joined: Jun 29, 2007
Posts: 176
Location: North-East England
Audio files: 1
|
| Posted: Fri Oct 05, 2007 7:49 am Post subject:
|
|
|
| or maybe even hpgl files. |
|
|
Back to top
|
|
|
norman phay
Joined: Jun 29, 2007
Posts: 176
Location: North-East England
Audio files: 1
|
| Posted: Fri Oct 05, 2007 9:32 am Post subject:
|
|
|
| The only tip I have, what's worked for me anyway, is to scale the window that front panel designer is in on the computer screen, so that the item you're designing is as close to actual size on the screen as possible. (I'm usually designing frac panels, so I hold a Blacet module against the screen, and scale the window up and down 'till it's exactly the same height. Then I hold the various items - pots, knob caps etc - up against the screen to gauge wether they'll fit, what it's going to look like, wether the controls are too close together and so on. Crude, but useful. |
|
|
Back to top
|
|
|
fonik
Joined: Jun 07, 2006
Posts: 3950
Location: Germany
Audio files: 23
|
| Posted: Fri Oct 05, 2007 10:35 am Post subject:
|
|
|
| State Machine wrote: | | Quote: | | front panels with lacquer stik fill in paint: |
I really want to hear more about this fill in process. Could you elaborate a bit on this or point me to a thread in which you may have explained this process? |
bill, it's nothing fancy, just a special wax crayon. the thread is over here:
http://electro-music.com/forum/viewtopic.php?highlight=fill+stik&t=19065
_________________
cheers,
matthias
____________
Big Boss at fonitronik
Tech Buddy at Random*Source |
|
|
Back to top
|
|
|
fonik
Joined: Jun 07, 2006
Posts: 3950
Location: Germany
Audio files: 23
|
|
|
Back to top
|
|
|
v-un-v
Janitor

Joined: May 16, 2005
Posts: 8932
Location: Birmingham, England, UK
Audio files: 11
G2 patch files: 1
|
| Posted: Fri Oct 05, 2007 2:37 pm Post subject:
|
|
|
| fonik wrote: | | State Machine wrote: | | Quote: | | front panels with lacquer stik fill in paint: |
I really want to hear more about this fill in process. Could you elaborate a bit on this or point me to a thread in which you may have explained this process? |
bill, it's nothing fancy, just a special wax crayon. the thread is over here:
http://electro-music.com/forum/viewtopic.php?highlight=fill+stik&t=19065 |
Bill, I've been doing a very similar thing recently with engraved writings on panels a university, but in my case I used a printer cartridge refilling syringe filled with diluted enamel paint. It takes ages but it looks good (sorry I don't have a photo right now). You could also use a hypodermic syringe, just don't prick yourself!!  
_________________
ACHTUNG!
ALLES TURISTEN UND NONTEKNISCHEN LOOKENPEEPERS!
DAS KOMPUTERMASCHINE IST NICHT FÜR DER GEFINGERPOKEN UND MITTENGRABEN! ODERWISE IST EASY TO SCHNAPPEN DER SPRINGENWERK, BLOWENFUSEN UND POPPENCORKEN MIT SPITZENSPARKSEN.
IST NICHT FÜR GEWERKEN BEI DUMMKOPFEN. DER RUBBERNECKEN SIGHTSEEREN KEEPEN DAS COTTONPICKEN HÄNDER IN DAS POCKETS MUSS.
ZO RELAXEN UND WATSCHEN DER BLINKENLICHTEN. |
|
|
Back to top
|
|
|
wooster
Joined: Jul 25, 2007
Posts: 63
Location: Austin, TX
|
| Posted: Fri Oct 05, 2007 3:25 pm Post subject:
|
|
|
Here is a link to Front Designer; it is not shareware.
http://www.abacom-online.de/uk/html/body_frontdesigner.html
Some of the US websites (Saelig?) are trying to charge almost twice the price; I think I may have downloaded it directly from the manufacturer.
| Quote: | | The only tip I have, what's worked for me anyway, is to scale the window that front panel designer is in on the computer screen, so that the item you're designing is as close to actual size on the screen as possible |
Norman brings up a good point - the best way to save money is to make sure you are ordering a panel that is usable. His idea is good; you can also print it out full size and measure everything by hand. My first panel that I ordered from them I made all of the pot holes with 3/8 " diameter even though I planned to use pots with 7mm bushinigs. The panel still looks okay but I had to be really careful when tightening the nuts to make sure everything was centered. |
|
|
Back to top
|
|
|
State Machine
Janitor
Joined: Apr 17, 2006
Posts: 2810
Location: New York
Audio files: 24
|
| Posted: Fri Oct 05, 2007 5:28 pm Post subject:
|
|
|
| Quote: | | Bill, I've been doing a very similar thing recently with engraved writings on panels a university, but in my case I used a printer cartridge refilling syringe filled with diluted enamel paint. It takes ages but it looks good (sorry I don't have a photo right now). You could also use a hypodermic syringe, just don't prick yourself!! |
Tom, yes, that sounds like a good alternative as well. The advantage to the stick is that it is more or less instant but your idea is very workable as well if one does not need the instant gratification.
Two very good ideas, thanks !
Bill |
|
|
Back to top
|
|
|
State Machine
Janitor
Joined: Apr 17, 2006
Posts: 2810
Location: New York
Audio files: 24
|
| Posted: Fri Oct 05, 2007 5:31 pm Post subject:
|
|
|
| Quote: | | bill, it's nothing fancy, just a special wax crayon. the thread is over here: |
OK, see it ....... thanks. Sometimes "nothing fancy" are the most elegant of solutions 
Thanks !
Bill |
|
|
Back to top
|
|
|
wooster
Joined: Jul 25, 2007
Posts: 63
Location: Austin, TX
|
| Posted: Fri Oct 12, 2007 10:35 am Post subject:
|
|
|
clickmrmike asked for an example FrontDesigner file, so I thought I would post it here along with instructions for getting the hpgl file out of FrontDesigner and into FrontPanelDesigner. The example is a 6U MOTM format panel with MFOS SVF, 2x MFOS ADSR, and MFOS Dual VCA.
In FrontDesigner:
1) Draw everything including text with the pen set to "Engraving".
2) For precise positioning of objects, click on the object and enter the desired coordinates in the lower right corner.
3) When you export to HPGL, all lines which have the same engraving width will be grouped together in one layer. After the HPGL is imported into FrontPanelDesigner, you will only be able to set properties of this layer as an atomic unit. I've been using 3 layers, one for thin lines, one for thick lines, and one for guidemarks which will be deleted before being uploaded for manufacturing.
4) Drillings can be exported from FrontDesigner, but not imported into FrontPanelDesigner, so mark them with guidemarks (i.e. a plus sign), using the engraving width you have chosen for guidemarks.
5) I mark rectangular holes with a box using the guidemark engraving width.
6) When you are done, select "File->Export->HPGL machine files". A dialog box will appear. Each of the different layers will appear in the Jobs list; make sure there are no engraving widths that you don't expect. Select the "Common origin" checkbox and push OK.
In FrontPanelDesigner:
7) Start with a blank front panel of the dimensions you desire. Make sure the origin is in the lower left corner.
8 ) Click "Insert->HPGL Engraving"
9) You will get a tool with crosshairs; click the origin (make sure coordinates are "X: 0.0000 Y: 0.0000".
10) A dialog box will appear. Load the first HPGL layer you exported. Set the tool to the final desired width (can be different than the FrontDesigner engraving width you specified) and set the in-fill color. Click the radio button "Origin of HPGL file" and push OK. The engaving should appear exactly aligned with no need of manual adjustment.
11) Repeat steps 8-11 for the rest of the layers.
12) Add drillings based on the guidemark layer.
13) Delete the guidemark layer.
14) Double check everything.
15) Print out on paper.
16) Triple check.
17) Upload.
| Description: |
| Examples of a front panel in both FrontDesigner and FrontPanelDesigner format |
|

Download (listen) |
| Filename: |
svfadsrvca_144.zip |
| Filesize: |
40.85 KB |
| Downloaded: |
813 Time(s) |
|
|
|
Back to top
|
|
|
ultra
Joined: Dec 04, 2006
Posts: 55
Location: oshkosh, wi
|
| Posted: Thu Jan 10, 2008 8:22 pm Post subject:
|
|
|
thanks for this nice tutorial. i think i'm gonna buy frontdesigner tomorrow so i can save some money on engravings with fpe.
is there a minimum font height in fpe that will still give you good results? i guess my concern is i don't know how it will end up looking in the end. i don't want to order something and have the text look all funny. |
|
|
Back to top
|
|
|
Sound
Joined: Jun 06, 2006
Posts: 842
Audio files: 1
|
| Posted: Fri Jan 25, 2008 1:44 pm Post subject:
|
|
|
Hello,
In the FrontDesigner 3.0 when you enter a text label it leaves the label below and right of the point selected with the cursor.
Is there any way so that the center of the label coincides with the point selected with the cursor?
Or... is there any way for show any reference point of the center of a label?
I hope that my English will be understandable.
Like always, thanks. |
|
|
Back to top
|
|
|
factus10
Joined: Jun 20, 2007
Posts: 158
Location: Buffalo, NY
|
|
|
Back to top
|
|
|
v-un-v
Janitor
Joined: May 16, 2005
Posts: 8932
Location: Birmingham, England, UK
Audio files: 11
G2 patch files: 1
|
|
|
Back to top
|
|
|
factus10
Joined: Jun 20, 2007
Posts: 158
Location: Buffalo, NY
|
| Posted: Fri Jan 25, 2008 2:14 pm Post subject:
|
|
|
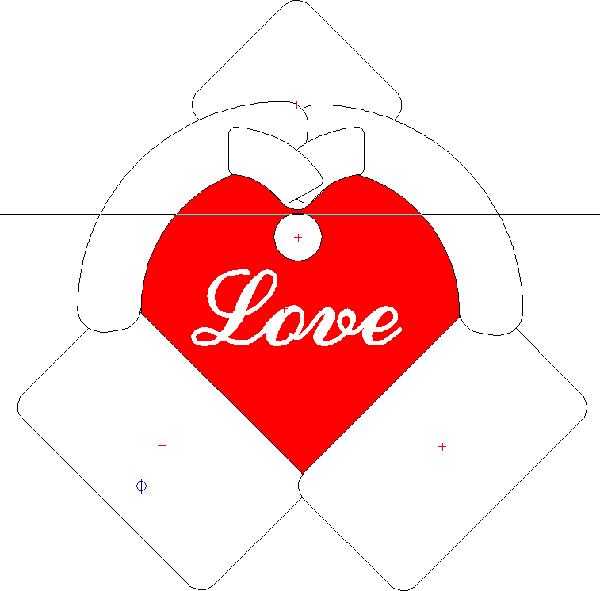
lol! you've ruined the surprise 
yea, it's probably tacky. Don't tell my girlfriend 
Someone at FPE thought it was nice. Fair warning, though: b/c there are cuts on all sides, there's a special machining charge ($15). |
|
|
Back to top
|
|
|
Alienation

Joined: Jul 23, 2007
Posts: 47
Location: Midsouth
|
| Posted: Fri Jan 25, 2008 2:28 pm Post subject:
|
|
|
Hmmmm...... a valentine modular.  |
|
|
Back to top
|
|
|
factus10
Joined: Jun 20, 2007
Posts: 158
Location: Buffalo, NY
|
|
|
Back to top
|
|
|
ericcoleridge

Joined: Jan 16, 2007
Posts: 889
Location: NYC
|
| Posted: Wed Jan 30, 2008 11:34 am Post subject:
|
|
|
| fonik wrote: | 1st as already mentioned use one text object with multiple rows for text in columns.
|
fonik,
Can you further explain how this is accomplished? |
|
|
Back to top
|
|
|
fonik
Joined: Jun 07, 2006
Posts: 3950
Location: Germany
Audio files: 23
|
| Posted: Wed Jan 30, 2008 11:54 am Post subject:
|
|
|
just create a text object. while editing the text in the text field you can easily insert paragraphs (multiple lines) by hitting the enter key (just as usual).
you will have to change the line spacing according to text height and your needs.
adjust alignment.
_________________
cheers,
matthias
____________
Big Boss at fonitronik
Tech Buddy at Random*Source |
|
|
Back to top
|
|
|
|

 Forum index » DIY Hardware and Software