| Author |
Message |
strategy

Joined: Jan 03, 2009
Posts: 87
Location: portland, oregon
|
 Posted: Sun Feb 07, 2010 12:38 pm Post subject: Posted: Sun Feb 07, 2010 12:38 pm Post subject:
|
  |
|
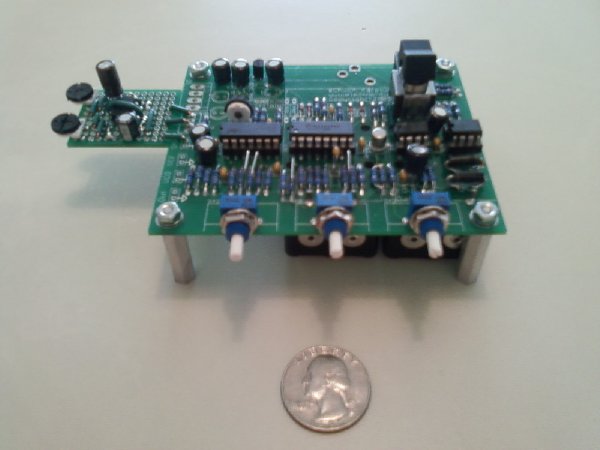
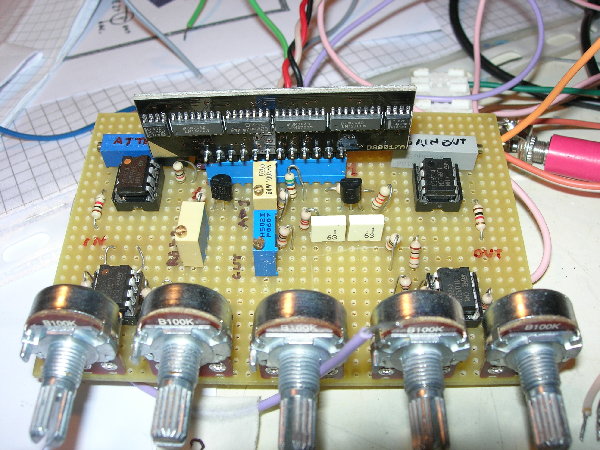
This is the Gristleizer done from the PCB issued recently on this forum and at and on diystompboxes.com.
I shall use it to start a Throbbing Gristle cover band, tentatively named Pulsating Tissue. (Just kidding)
I don't recommend building the fuzz pictured with this device, it is a complicated build and very difficult to dial in sensible settings with.
- Strategy

_________________
--------
community-library.net/strategyhome.htm |
|
|
Back to top
|
|
 |
creekree

Joined: Mar 30, 2006
Posts: 192
Location: Morgenland Neukölln
Audio files: 1
|
| Posted: Sun Feb 07, 2010 5:07 pm Post subject:
|
|
|
who would've thought that i actually would get something finished eventually maybe?
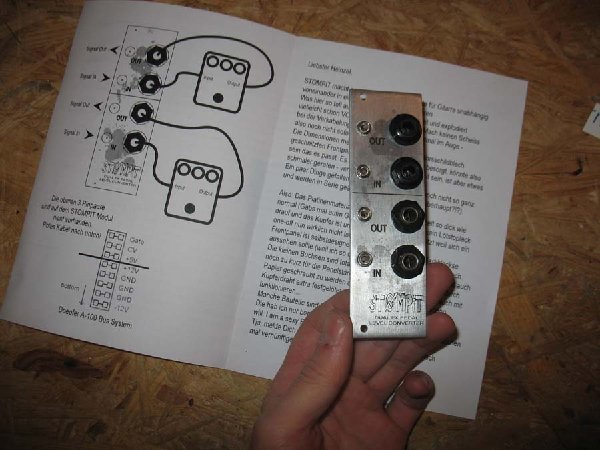
emerging from my pile of almost-ready-but-missing-one-component soon-to-be-not-just-electronic-junk-anymore-stuff i give you STOMPIT!
this is a dual ken stone stomp box adapter that a friend asked me to make for his doepfer system. lots of recycled components (check those HUGE resistors!) and my own pcb layout. frontpanel turned out not as good as i hoped - the darker spots are supposed to look like dripping spraypaint but do a poor job at it.
apart from that the thing works great. because i am such a good friend i even wrote him a manual 
| Description: |
|
| Filesize: |
82.52 KB |
| Viewed: |
577 Time(s) |
| This image has been reduced to fit the page. Click on it to enlarge. |

|
| Description: |
|
| Filesize: |
86.38 KB |
| Viewed: |
587 Time(s) |
| This image has been reduced to fit the page. Click on it to enlarge. |
|
|
|
|
Back to top
|
|
|
Skrog Productions

Joined: Jan 07, 2009
Posts: 1220
Location: Scottish Borders
Audio files: 159
|
| Posted: Sun Feb 07, 2010 5:32 pm Post subject:
|
|
|
[quote="strategy"]
I don't recommend building the fuzz pictured with this device, it is a complicated build and very difficult to dial in sensible settings with.
Cool build, 'hmm is this edible i wonder'  |
|
|
Back to top
|
|
|
Skrog Productions
Joined: Jan 07, 2009
Posts: 1220
Location: Scottish Borders
Audio files: 159
|
| Posted: Sun Feb 07, 2010 5:39 pm Post subject:
|
|
|
creekree......
that's great , i will have to get mine finished, i see behringer do a multi FX stompbox , seen them under £30.00 new on ebay..  |
|
|
Back to top
|
|
|
-minus-
Joined: Oct 26, 2008
Posts: 787
Audio files: 13
|
| Posted: Thu Feb 11, 2010 10:55 am Post subject:
|
|
|
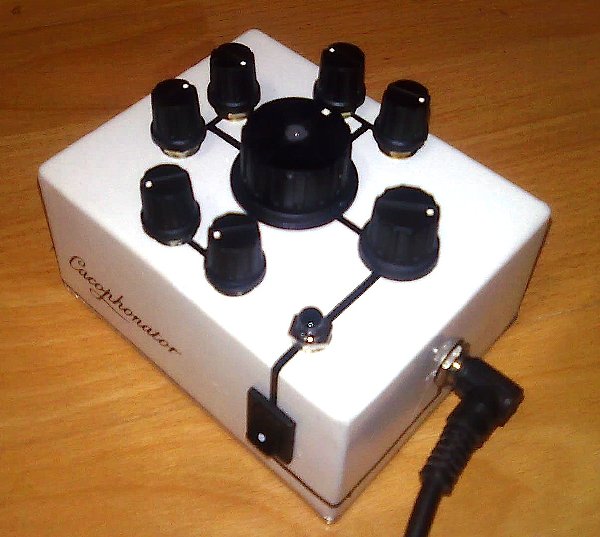
Completed moments ago, my first device for 2010: an Art Harrison 'Cocophonator'.
http://theremin.us/Circuit_Library/cacophonator.html
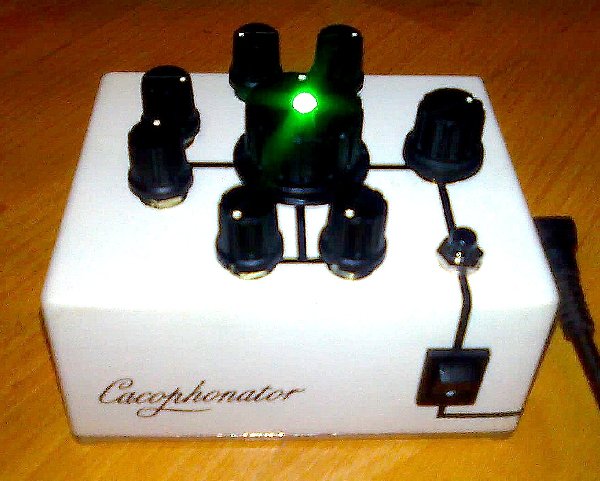
Built on stripboard with a RGB colour change LED mounted in the central pot.
Now to wake up the neighbourhood at 4.50AM! 
Apologies for the dodgy photos taken using a phone... I'll edit and post better ones when I get my hands on a camera.
| Description: |
|
| Filesize: |
307.94 KB |
| Viewed: |
621 Time(s) |
| This image has been reduced to fit the page. Click on it to enlarge. |
|
| Description: |
|
| Filesize: |
348.45 KB |
| Viewed: |
577 Time(s) |
| This image has been reduced to fit the page. Click on it to enlarge. |
|
Last edited by -minus- on Mon Mar 08, 2010 9:18 pm; edited 1 time in total |
|
|
Back to top
|
|
|
strategy
Joined: Jan 03, 2009
Posts: 87
Location: portland, oregon
|
| Posted: Thu Feb 11, 2010 11:00 am Post subject:
|
|
|
I really like the "LED knob" is that something you can get like that off the shelf, or did you modify the knob to accommodate the LED?
Cool build!
- Strategy
| -minus- wrote: | Completed moments ago, my first device for 2010: an Art Harrison 'Cocophonator'.
http://home.att.net/~theremin1/Circuit_Library/cacophonator.html
Built on stripboard with a RGB colour change LED mounted in the central pot.
Now to wake up the neighbourhood at 4.50AM!
Apologies for the dodgy photos taken using a phone... I'll edit and post better ones when I get my hands on a camera. |
_________________
--------
community-library.net/strategyhome.htm |
|
|
Back to top
|
|
|
-minus-
Joined: Oct 26, 2008
Posts: 787
Audio files: 13
|
| Posted: Thu Feb 11, 2010 11:38 am Post subject:
|
|
|
I really like the "LED knob" is that something you can get like that off the shelf, or did you modify the knob to accommodate the LED?
No, I modified an existing knob. Cut a bit off the top off a spline shaft metric pot to accommodate the LED. Fed the plastic insulation off some wire onto the legs of the LED to insulate them, then slotted the LED legs into the slot cut into the pot shaft. Had to pry the slot open a bit to get the legs in! I drilled a hole in the top of the knob for the LED to poke through. Had to file the collar of the LED a bit to make it fit.
Under the pot knob, I drilled a hole into the box to feed the wires in. Would have been a lot easier had I mounted the LED off centre... like a pointer or something. Still, it wasn't impossible. The LED automatically changes from red to green to blue to purple to pink etc... |
|
|
Back to top
|
|
|
macumbista

Joined: Sep 12, 2007
Posts: 398
Location: berlin
Audio files: 3
|
|
|
Back to top
|
|
|
The Bad Producer

Joined: Mar 08, 2009
Posts: 282
Location: The Manhole
|
| Posted: Fri Feb 12, 2010 12:48 pm Post subject:
|
|
|
That is great Derek!
I've been toying with a Eurorack panel for two of these, but you've inspired me (after listening to your demo, and seeing your synth) to add the Analogue Logic board to mine as well, thanks!
This is the version without:

Charlie
PS Sliders arrived safely, thank you sooo much!
_________________
http://loudestwarning.tumblr.com/ |
|
|
Back to top
|
|
|
kkissinger
Stream Operator

Joined: Mar 28, 2006
Posts: 1451
Location: Kansas City, Mo USA
Audio files: 45
|
| Posted: Fri Feb 12, 2010 10:54 pm Post subject:
So far, so good for 2010 |
|
|
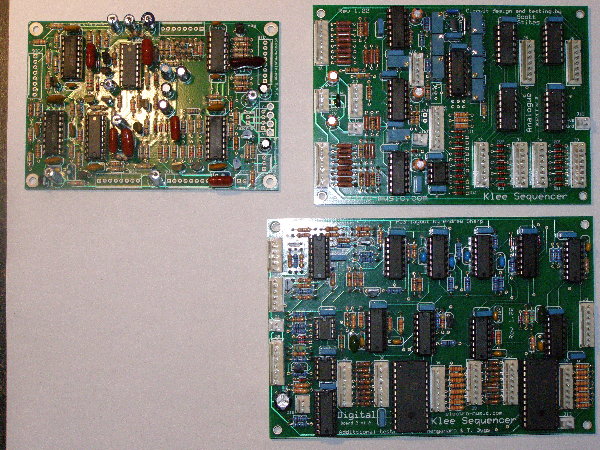
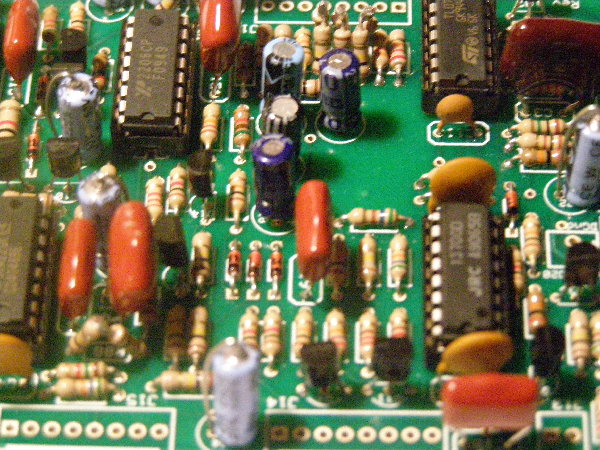
Just finished populating the Klee Sequencer boards and an MPS board.
I'm still working on the panel designs. Also begining to populate two MFOS Voltage Quantizers. Nothing to show for them except a bag of parts, though.
| Description: |
|
| Filesize: |
4.99 MB |
| Viewed: |
410 Time(s) |
| This image has been reduced to fit the page. Click on it to enlarge. |
|
| Description: |
|
| Filesize: |
4.52 MB |
| Viewed: |
414 Time(s) |
| This image has been reduced to fit the page. Click on it to enlarge. |
|
_________________
-- Kevin
http://kevinkissinger.com |
|
|
Back to top
|
|
|
adamon
Joined: May 15, 2009
Posts: 96
Location: Lawrence Kansas
Audio files: 3
|
|
|
Back to top
|
|
|
iorobyy

Joined: Sep 26, 2005
Posts: 65
Location: Italy
|
| Posted: Sun Feb 14, 2010 4:14 pm Post subject:
|
|
|
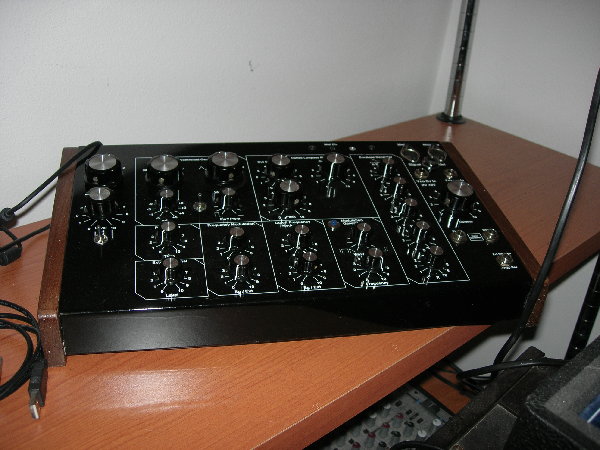
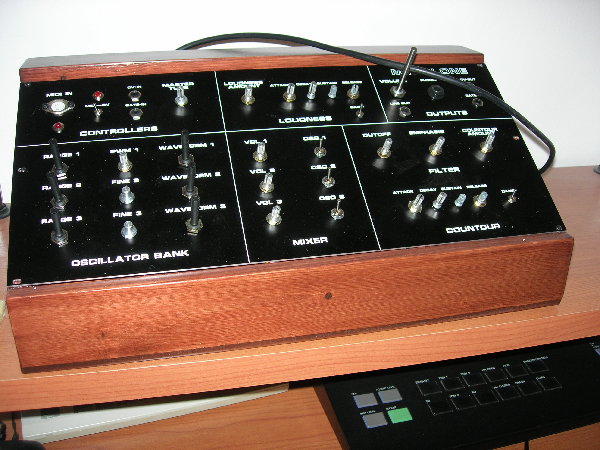
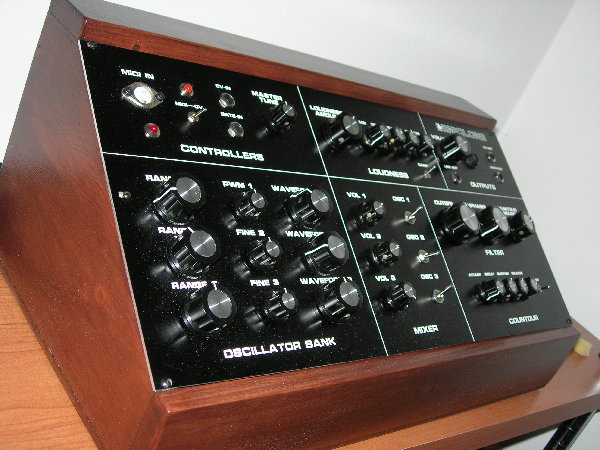
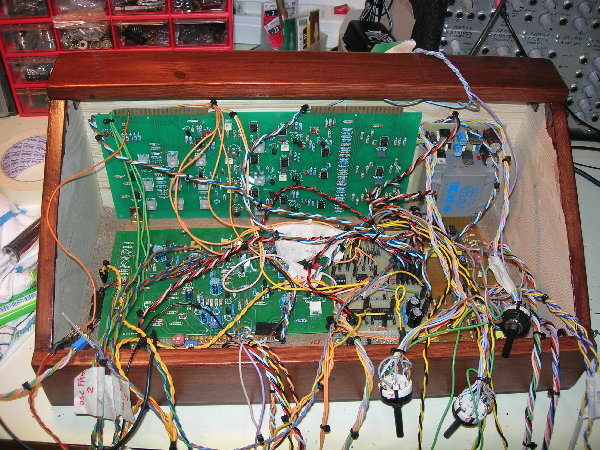
this is my productions
-korg ms10 desktop clone
-minimoog clone --- bassline version
-juno106 vcf and vca clone
| Description: |
|
| Filesize: |
940.82 KB |
| Viewed: |
451 Time(s) |
| This image has been reduced to fit the page. Click on it to enlarge. |
|
| Description: |
|
| Filesize: |
754.72 KB |
| Viewed: |
360 Time(s) |
| This image has been reduced to fit the page. Click on it to enlarge. |
|
| Description: |
|
| Filesize: |
1.28 MB |
| Viewed: |
364 Time(s) |
| This image has been reduced to fit the page. Click on it to enlarge. |
|
| Description: |
|
| Filesize: |
808.62 KB |
| Viewed: |
363 Time(s) |
| This image has been reduced to fit the page. Click on it to enlarge. |
|
|
|
|
Back to top
|
|
|
iorobyy
Joined: Sep 26, 2005
Posts: 65
Location: Italy
|
| Posted: Sun Feb 14, 2010 4:27 pm Post subject:
|
|
|
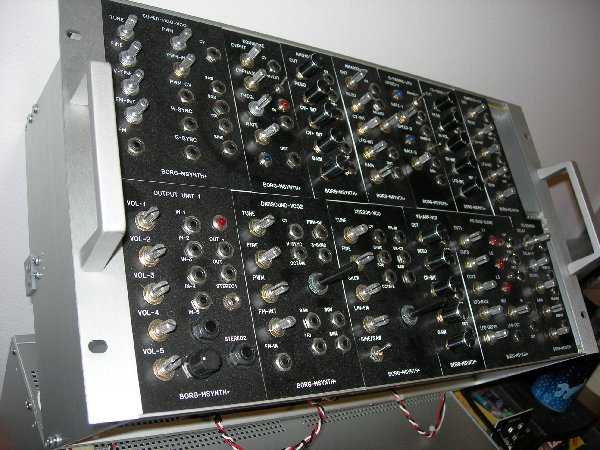
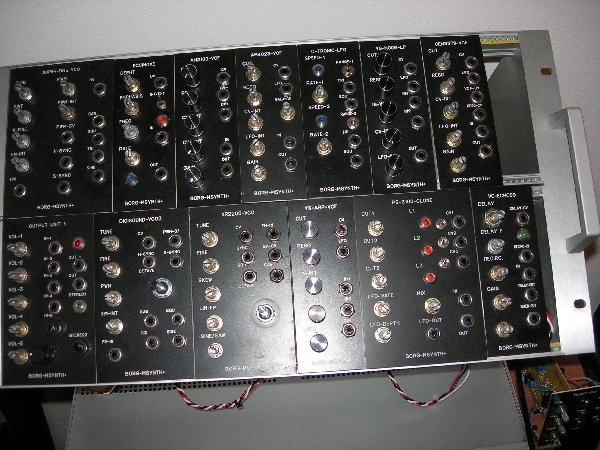
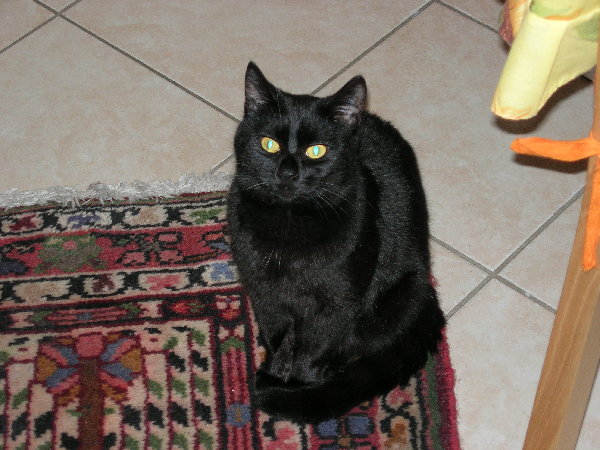
other pics of my minimoog clone and modular and my borg led eyes synth cat
| Description: |
|
| Filesize: |
754.21 KB |
| Viewed: |
363 Time(s) |
| This image has been reduced to fit the page. Click on it to enlarge. |
|
| Description: |
|
| Filesize: |
925.75 KB |
| Viewed: |
360 Time(s) |
| This image has been reduced to fit the page. Click on it to enlarge. |
|
| Description: |
|
| Filesize: |
840.76 KB |
| Viewed: |
371 Time(s) |
| This image has been reduced to fit the page. Click on it to enlarge. |
|
| Description: |
|
| Filesize: |
847.78 KB |
| Viewed: |
340 Time(s) |
| This image has been reduced to fit the page. Click on it to enlarge. |
|
|
|
|
Back to top
|
|
|
TekniK

Joined: Aug 10, 2008
Posts: 1059
|
| Posted: Sun Feb 14, 2010 4:40 pm Post subject:
|
|
|
| I like the ms10 clone and the cat |
|
|
Back to top
|
|
|
droffset

Joined: Feb 02, 2009
Posts: 515
Location: London area
Audio files: 2
|
|
|
Back to top
|
|
|
robotfunk
Joined: Jun 22, 2009
Posts: 20
Location: Netherlands
|
| Posted: Mon Feb 22, 2010 5:26 pm Post subject:
|
|
|
that colour looks familiar
I'm working on a Midibox Sequencer V4, and planning to do a proper case for it but since I had the bare guts working needed something to keep it into place unlike this:

so I made a temporary box like this
 |
|
|
Back to top
|
|
|
droffset
Joined: Feb 02, 2009
Posts: 515
Location: London area
Audio files: 2
|
|
|
Back to top
|
|
|
Inventor
Stream Operator

Joined: Oct 13, 2007
Posts: 6221
Location: near Austin, Tx, USA
Audio files: 267
|
|
|
Back to top
|
|
|
shawn
Joined: Dec 13, 2005
Posts: 209
Location: savannah
|
| Posted: Fri Feb 26, 2010 12:30 pm Post subject:
|
|
|
Finally debugged 1/2 of my dual PT2399 delay module that was build last year but since it's fully functional now I'm counting it as a 2010 build. Real front panels will come later.
 |
|
|
Back to top
|
|
|
Inventor
Stream Operator
Joined: Oct 13, 2007
Posts: 6221
Location: near Austin, Tx, USA
Audio files: 267
|
|
|
Back to top
|
|
|
julianw

Joined: Jul 30, 2007
Posts: 78
Location: UK
|
| Posted: Fri Feb 26, 2010 5:15 pm Post subject:
|
|
|
| Inventor wrote: | | Here is a photo of the circuit board that I built last night. |
Nice work Les. I'm stuffing the pcb right now, just saw the notes on dubugging, great info there - can't wait to get this baby fired up just need some BBD chips, 1st thing to do is hook up the Oberheim Strummer via MidiCV. Meanwhile I'll print the expo convertor docs and try to get my head around that. |
|
|
Back to top
|
|
|
Inventor
Stream Operator
Joined: Oct 13, 2007
Posts: 6221
Location: near Austin, Tx, USA
Audio files: 267
|
| Posted: Fri Feb 26, 2010 5:38 pm Post subject:
|
|
|
Cool, well at least now we know that it works, so any problems will be easier to discover. Good luck with your build, Julian!
Les
_________________
"Let's make noise for peace." - Kijjaz |
|
|
Back to top
|
|
|
kkissinger
Stream Operator
Joined: Mar 28, 2006
Posts: 1451
Location: Kansas City, Mo USA
Audio files: 45
|
| Posted: Mon Mar 01, 2010 9:24 am Post subject:
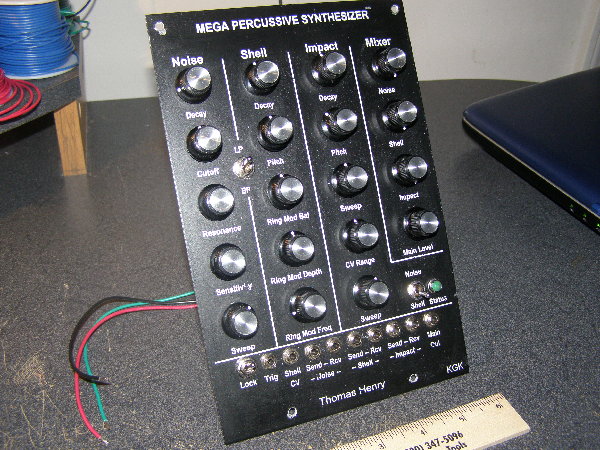
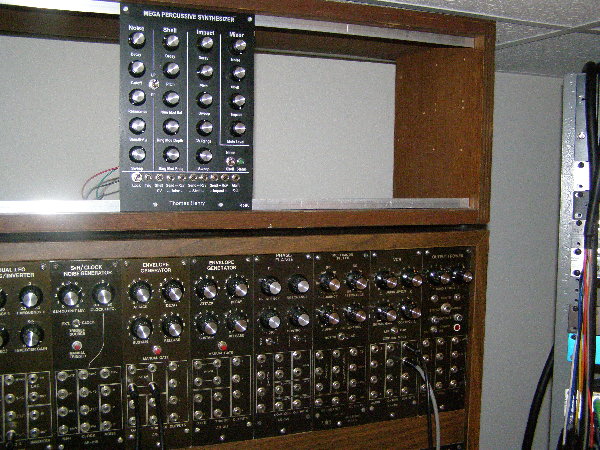
My MPS is alive! |
|
|
This module is now up an running and working well. I was up late exploring the sounds that it makes.
The panel layout, lettering, and color is designed to blend with my existing Aries equipment.
| Description: |
| This was the first panel that I've made with the DecalPro materials. |
|
| Filesize: |
1.51 MB |
| Viewed: |
370 Time(s) |
| This image has been reduced to fit the page. Click on it to enlarge. |
|
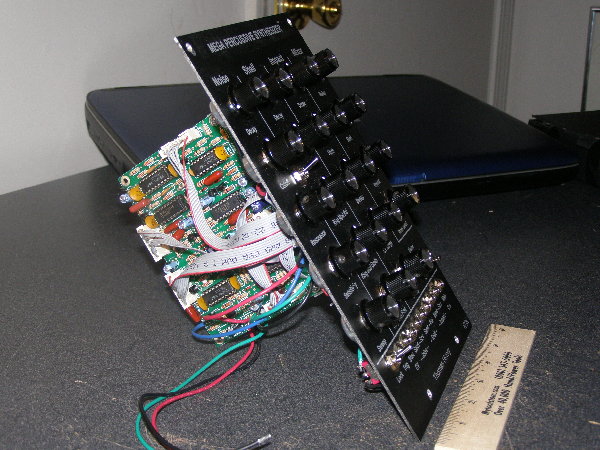
| Description: |
| View showing the circuit board |
|
| Filesize: |
1.5 MB |
| Viewed: |
353 Time(s) |
| This image has been reduced to fit the page. Click on it to enlarge. |
|
_________________
-- Kevin
http://kevinkissinger.com |
|
|
Back to top
|
|
|
ericcoleridge

Joined: Jan 16, 2007
Posts: 889
Location: NYC
|
| Posted: Mon Mar 01, 2010 10:31 am Post subject:
Re: My MPS is alive! |
|
|
| kkissinger wrote: |
The panel layout, lettering, and color is designed to blend with my existing Aries equipment. |
How do you get your white lettering on the blackground?
I have some blank dot.com panels that I'd like to use, but I don't know of anyway to get print onto them besides using labels or stickers. Would prefer to be able layout and print graphics. |
|
|
Back to top
|
|
|
kkissinger
Stream Operator
Joined: Mar 28, 2006
Posts: 1451
Location: Kansas City, Mo USA
Audio files: 45
|
| Posted: Mon Mar 01, 2010 11:23 am Post subject:
Re: My MPS is alive! |
|
|
| ericcoleridge wrote: | How do you get your white lettering on the background?
I have some blank dot.com panels that I'd like to use, but I don't know of anyway to get print onto them besides using labels or stickers. Would prefer to be able layout and print graphics. |
I first painted the panels with a satin black paint.
The DecalPro process is a toner transfer method. I printed the panel graphic on a lazer printer in black lettering on supplied toner transfer paper.
After that, one chooses a foil with the color one wants -- in my case, the satin silver color best matches the aluminum color on the Aries. (Although it appears to be white lettering in the photos, it is really an aluminum-looking color. Of course, there are white foils, too. One can choose between metallic-looking colors and just regular ink-link colors.
Anyway, one sandwiches the printed image (on the transfer paper) with the foil -- the foil adheres wherever there is toner.
The next step is the trickiest -- one must run this through the laminator with the clear (mylar) foil that eventually becomes the decal. Once the mylar is "fused" to the carrier paper, then one puts the whole think in a tray of water -- just like a decal. The image, in turn, is transferred to the clear mylar -- ready to be pressed on to the panel.
It is best to buy the kit they supply and work with the examples. There is a bit of a learning curve with it and it is easy to make mistakes. My decal application is not perfect... hopefully I will improve as I gain more experience with it.
The photo shows the new panel next to the existing modules so you can see how it has the same general "look" of the other modules.
(You may think, "hey -- it is close to the color of the wall." - well, my wall is light grey )
| Description: |
|
| Filesize: |
4.81 MB |
| Viewed: |
364 Time(s) |
| This image has been reduced to fit the page. Click on it to enlarge. |
|
_________________
-- Kevin
http://kevinkissinger.com |
|
|
Back to top
|
|
|
|

 Forum index » DIY Hardware and Software